Dolomite Shoulder II
Mountain height: 2755 m
Elevation gain: 750
m
Round-trip time: 6:10
Scrambling with Mark.
The most shocking aspect
of this trip was the lack of snow for this time of the year.
Looking for something
relatively short and not too physically strenuous, this trip was the first one
that came to mind. After a magnificent winter ascent in 2022, I was excited to
repeat the ascent with Mark. 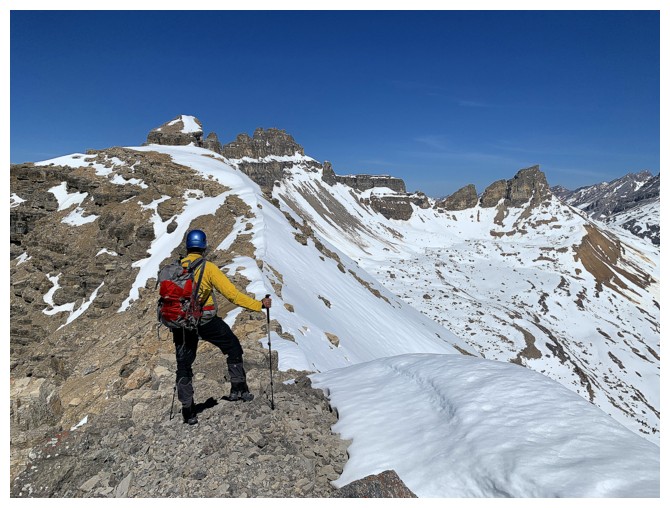 Obviously, we wouldn’t be experiencing the same
level of unbelievable cornice scenery, but the hope was that we could take
advantage of generally snow-free slopes lower down and then ascend into a
winter wonderful for the upper slopes.
Obviously, we wouldn’t be experiencing the same
level of unbelievable cornice scenery, but the hope was that we could take
advantage of generally snow-free slopes lower down and then ascend into a
winter wonderful for the upper slopes.
To our utter surprise we
arrived at the Mosquito Creek parking lot to the sight of an essentially
snow-free mountain from bottom to top. We assumed a recent heat wave would mean
less snow than normal for mid-May, but the white stuff was almost entirely
absent from the ascent – not unusual if you are in the Front Ranges but the
Dolomite Shoulder is smack-dab in the thick of the Main Range – an area that
should look like full-on winter until June.
As such, instead of the
taking the “normal” route that starts about a kilometre north of the parking
lot, we drove farther up the road, hoping to take a more direct route. This
worked remarkably well. The terrain was steep, but generally easy to ascend and
upon reaching treeline, the views were expectedly spectacular. This route also
gave us plenty of options to explore and take more difficult lines over easier
ones without being too committing.
We eventually topped out
on the ridge and then enjoyed an easy trudge up the to first of many highpoints
at the south end of Dolomite Peak – in sharp contrast to my 2002 ascent, where
it took me 30 minutes to traverse the final 100 m of super snowy terrain.
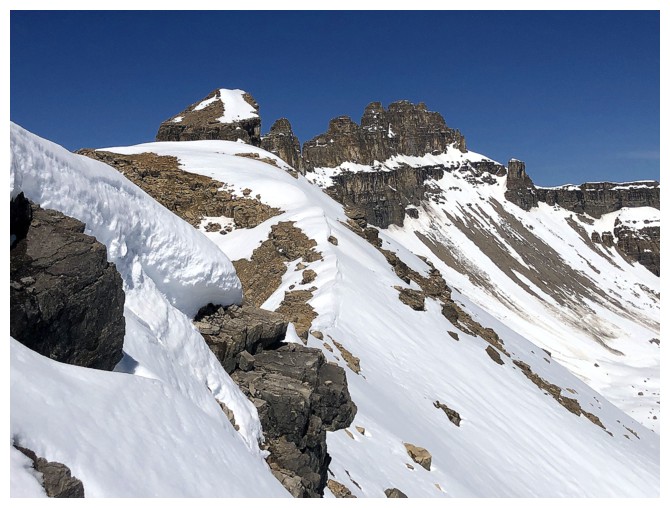
The next highpoint was
not far away and highlighted by a cool pinnacle on the connecting ridge. This
was as far as I had got on my previous trip. Of course, we were both curious to
see if the ridge would grant us further progress towards the southern-most of
Dolomite Peak’s spectacular towers. There appeared to be several drop-offs that
might require a rappel to descend.
Thankfully
that
assessment was wrong – until it was right! We made it to the highpoint
immediately south of the first tower, where scrambling progress
abruptly ended in
a severe drop-off. Travel on the ridge throughout was engaging and
replete with spell-binding views. After a most enjoyable summit break,
taking in the majestic views
we returned to the first highpoint and then took a slightly different
route
down using a tempting scree gully. Though a couple of detours were
required where
the gully became vertical, the route was generally easy and fast.
Totally awesome return to
a most worthwhile objective.

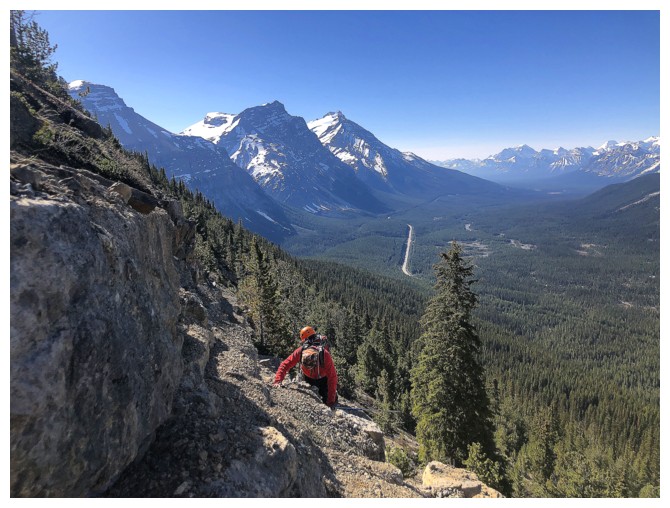
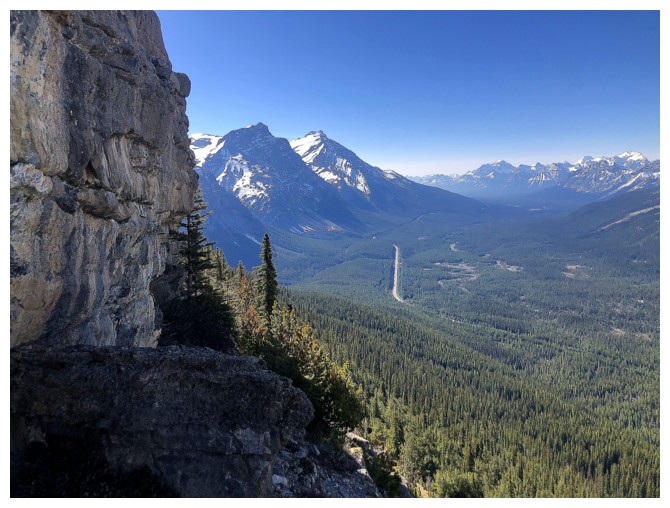
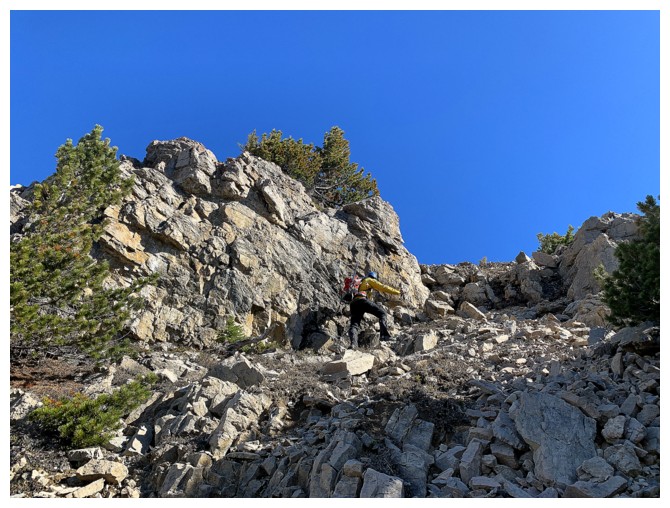
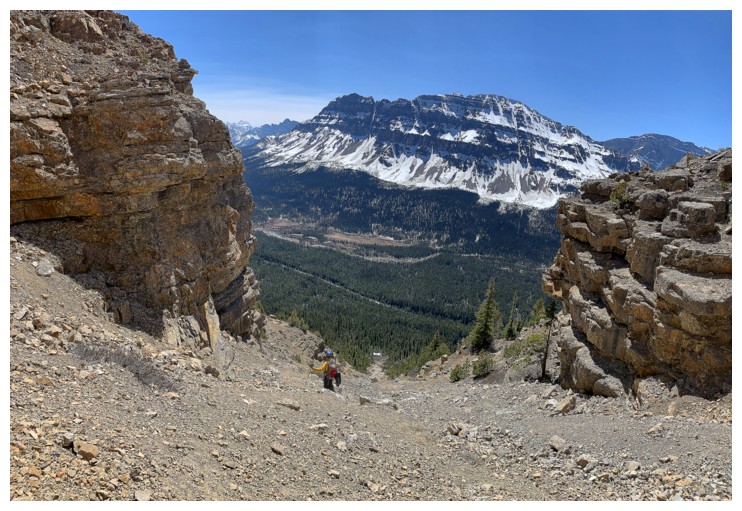
The ascent starts with a healthy dose of steep forest
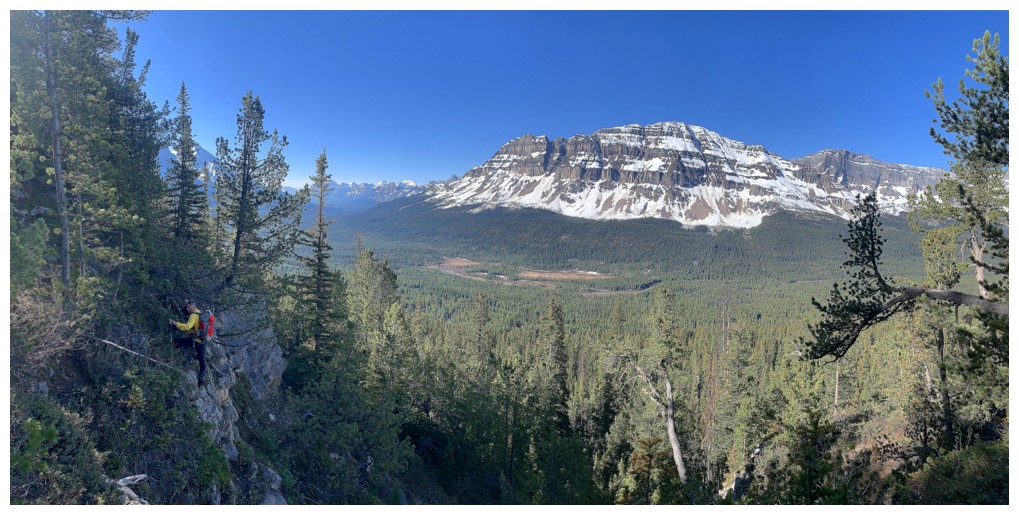
And a little exposed, but avoidable scrambling
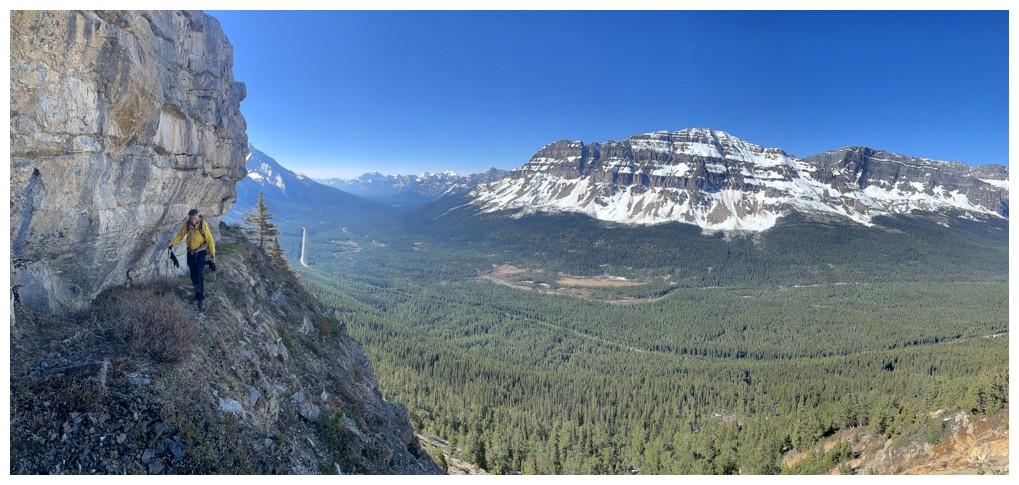
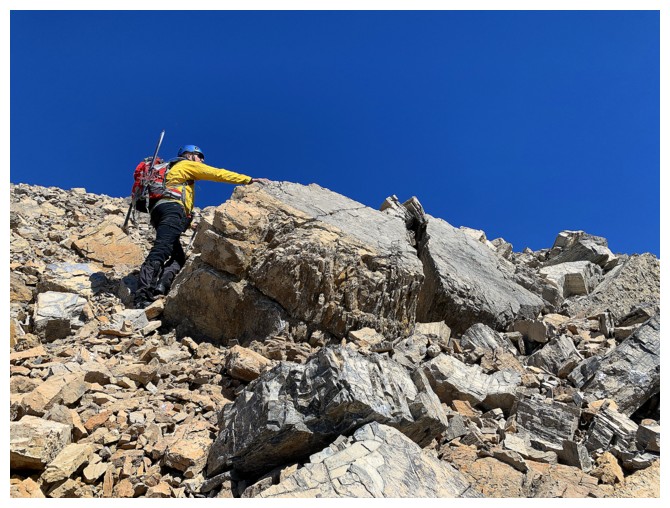
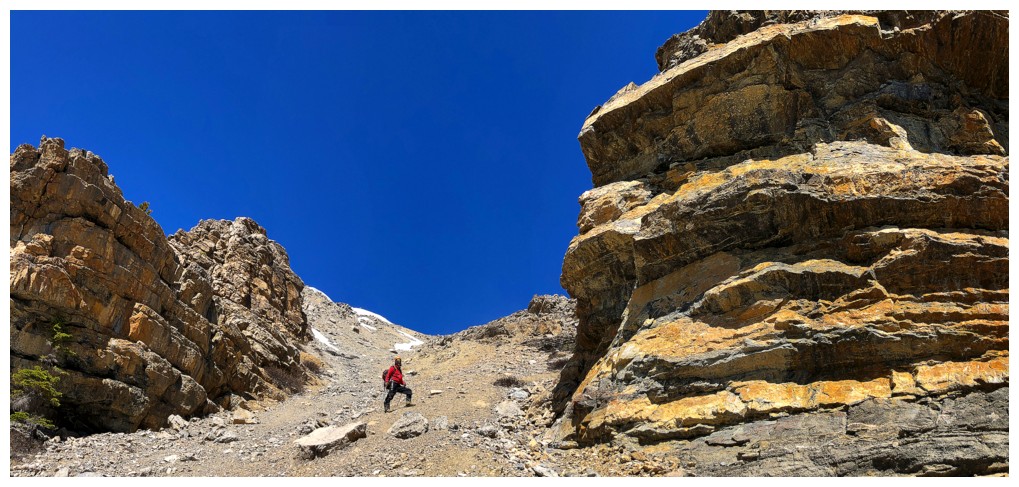
Above treeline and scrambling up the ledgey terrain
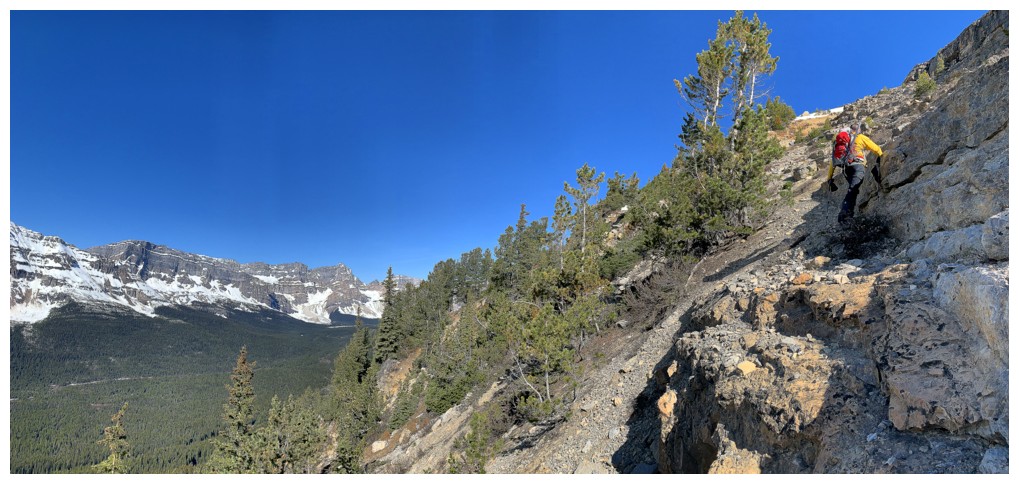
A scree ramp went all the way to the ridge, but it was more fun to scramble up the ledges to gain elevation
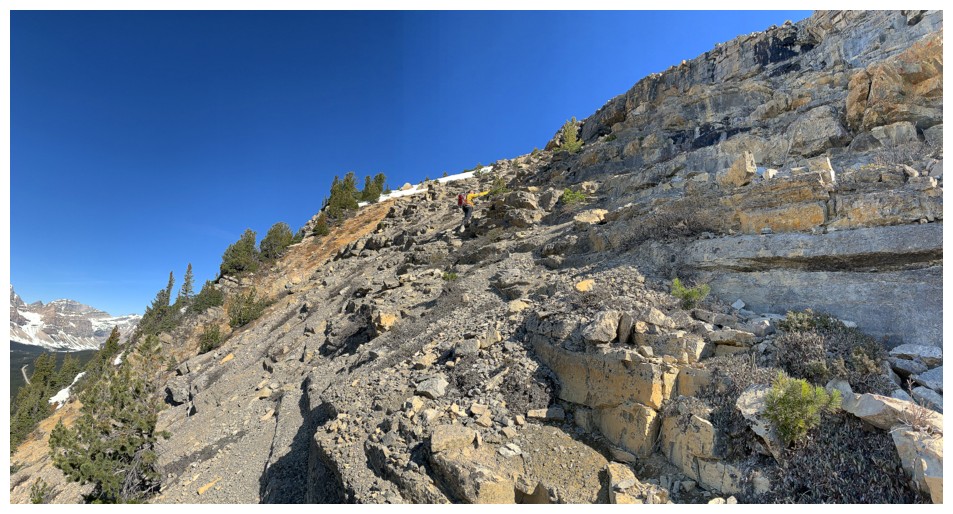
Heading up and to the right
Almost at the base of the vertical rock band above
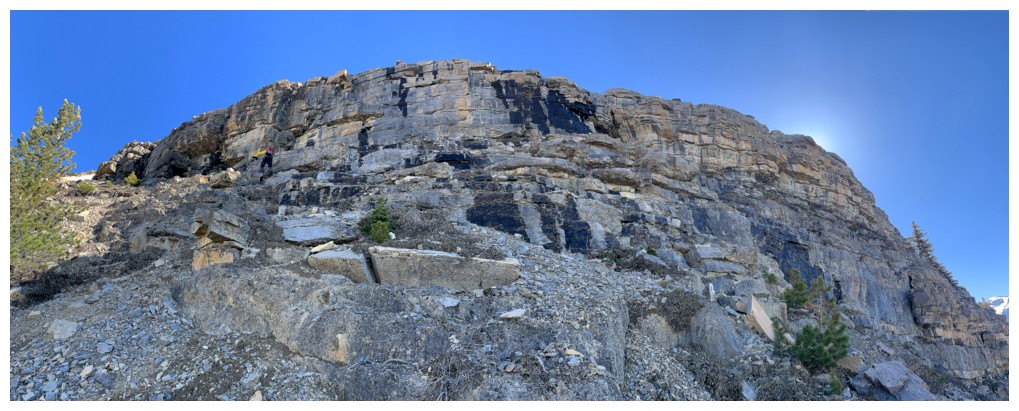
At the base, checking out the south side
Returning, after determining the north side was just as good
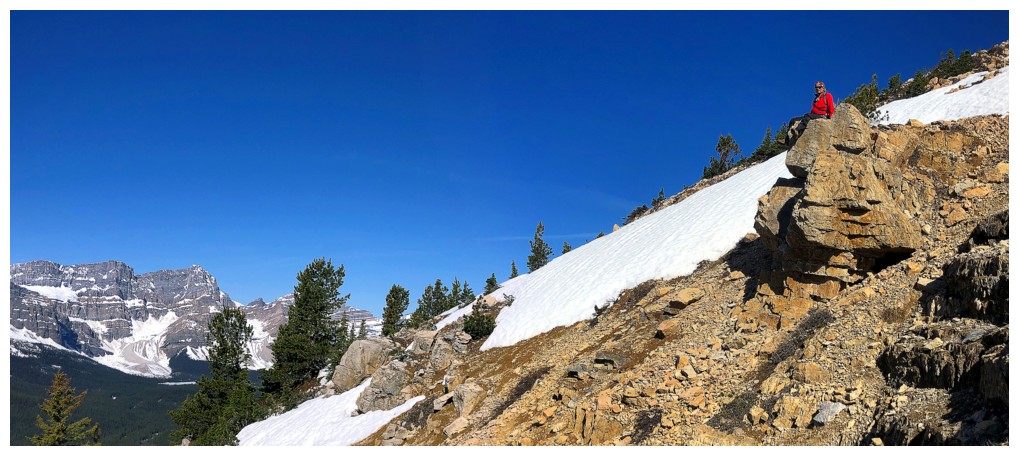
Mark finds a rocky perch
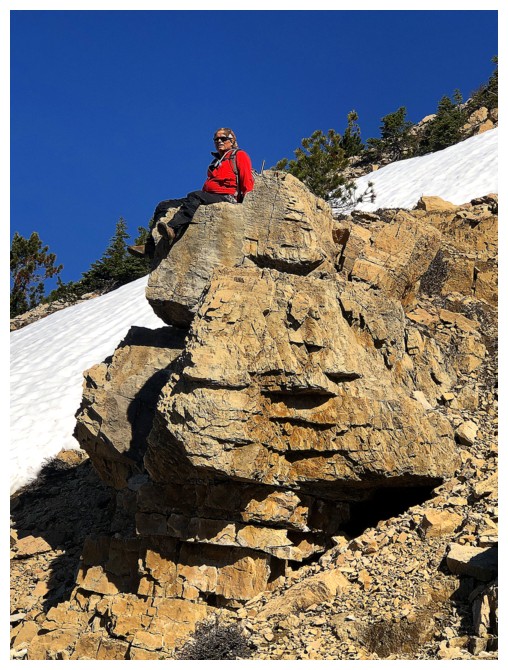
Close-up
Continuing up through the rocky terrain
And then onto scree and rubble
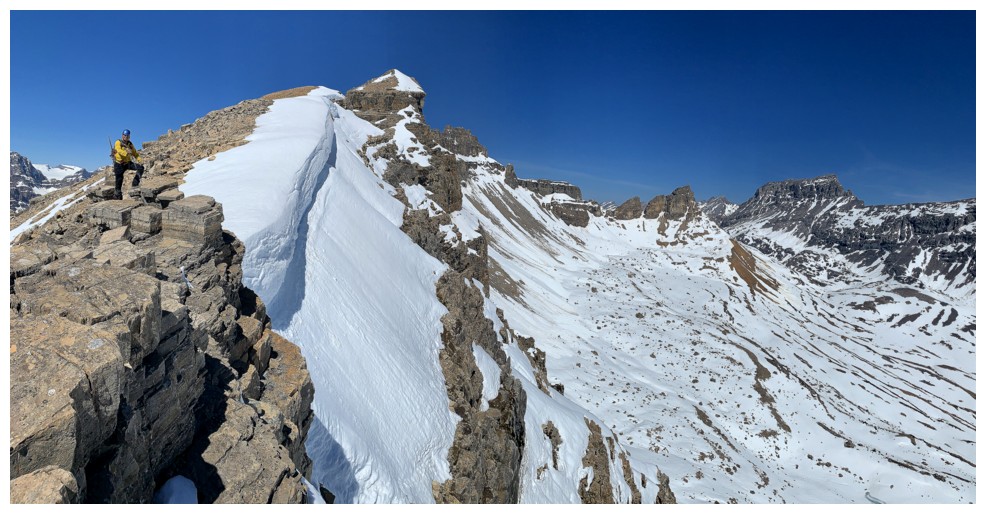
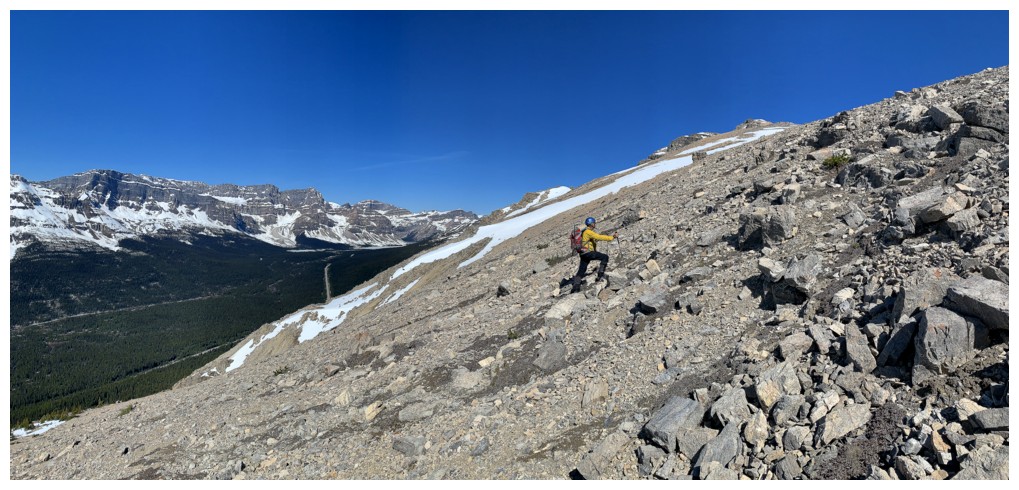
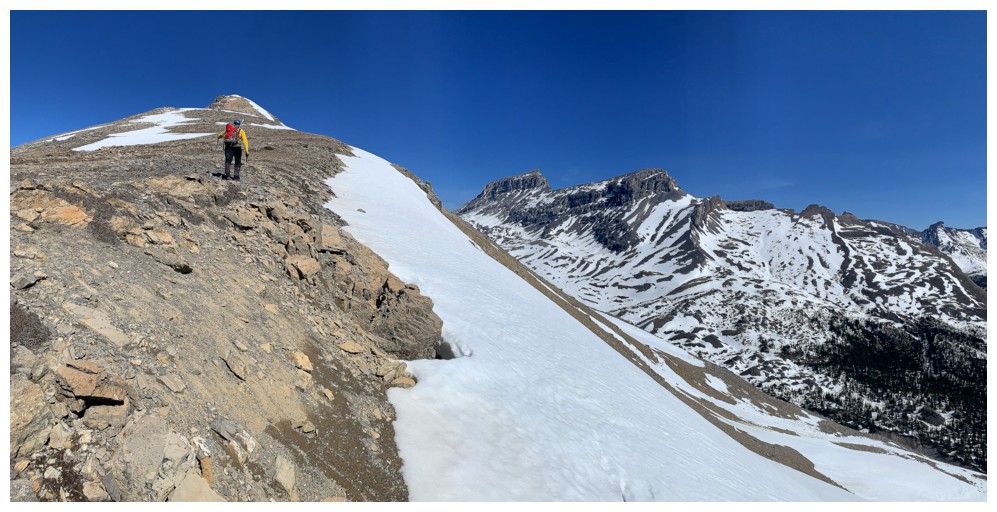
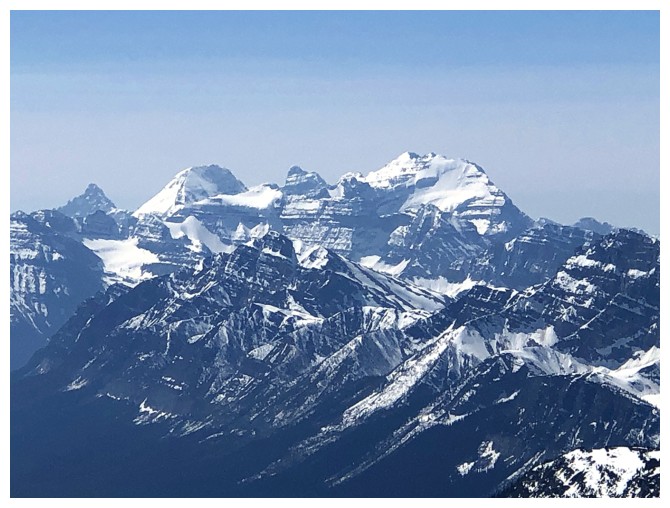
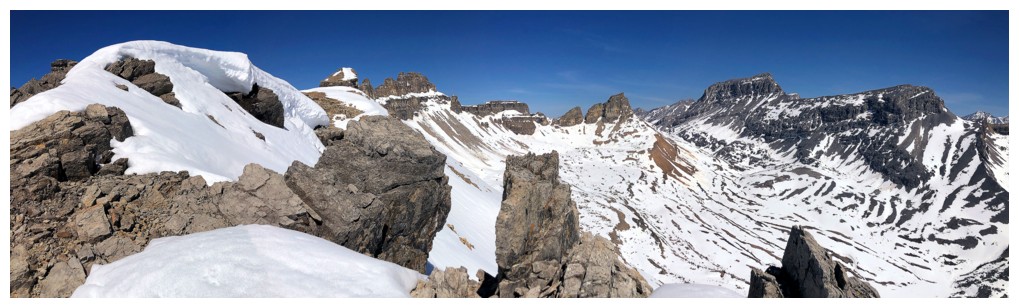
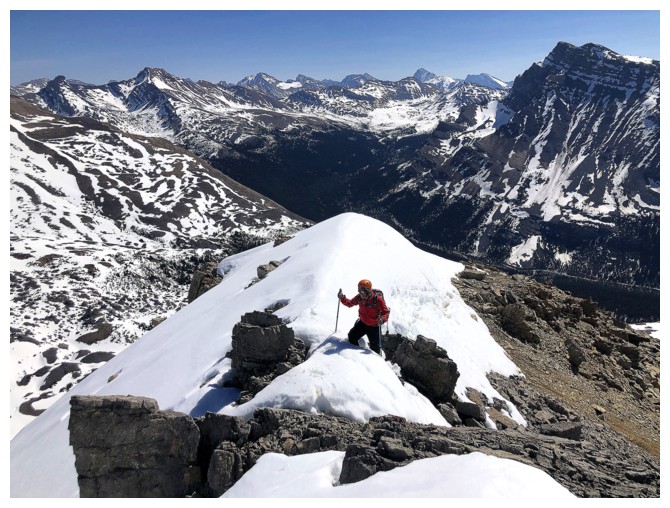
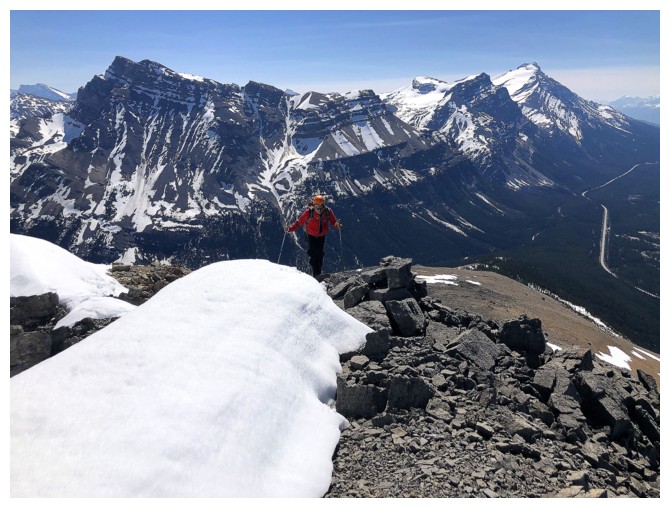
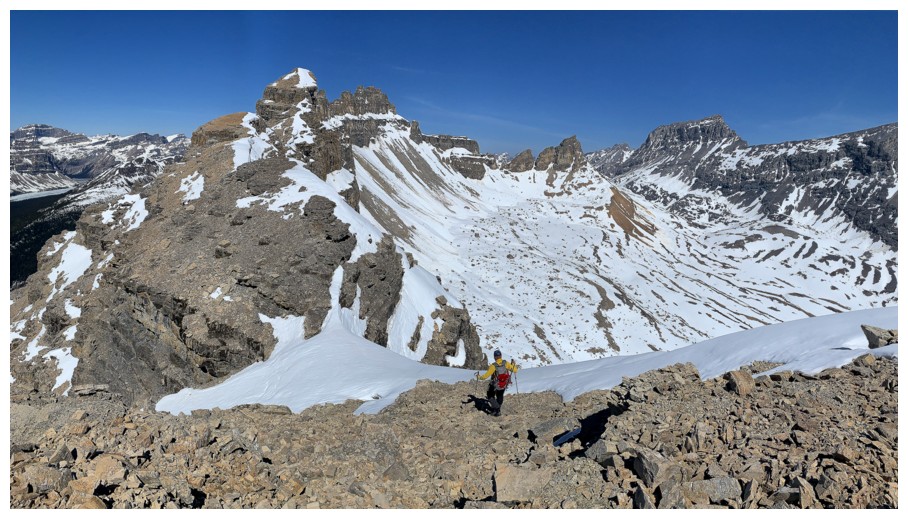
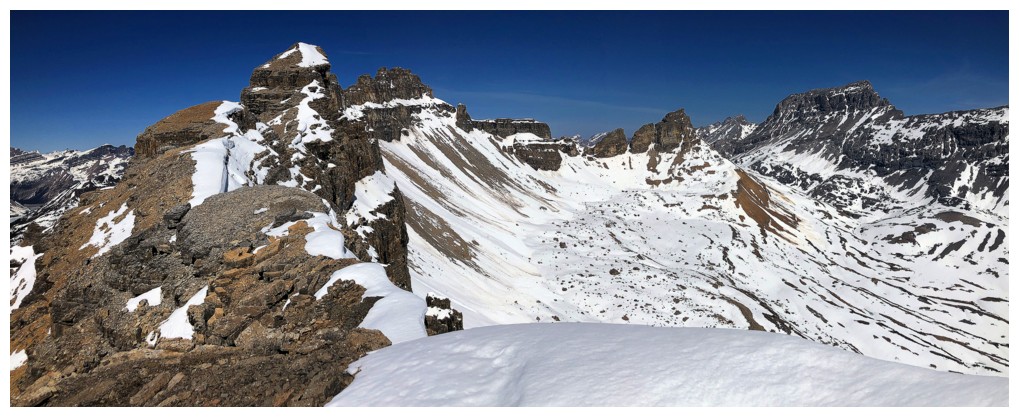
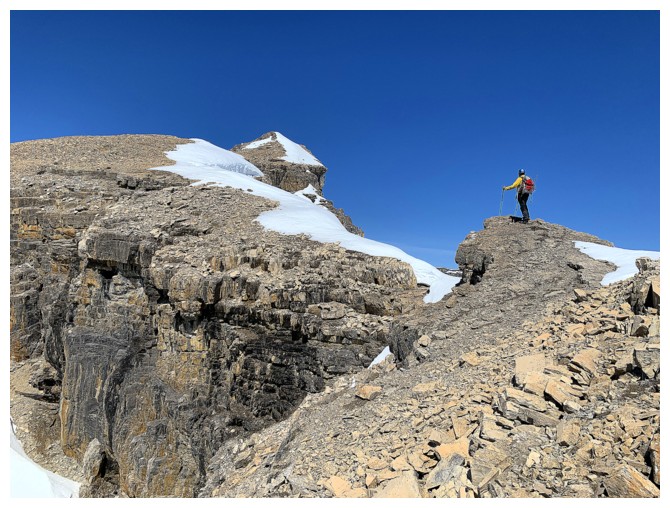
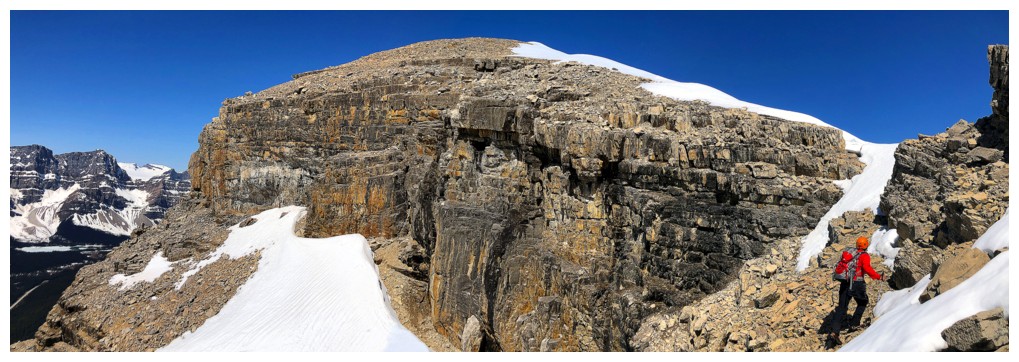
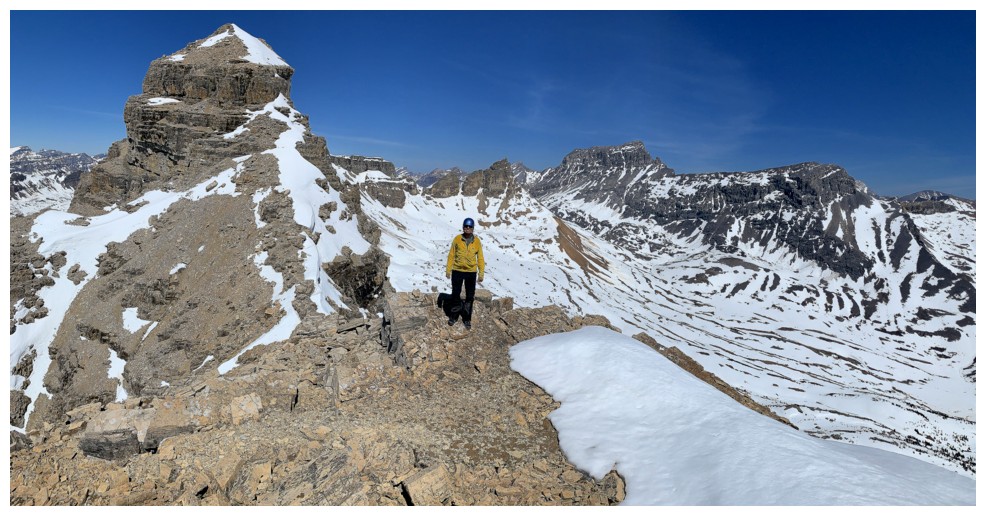
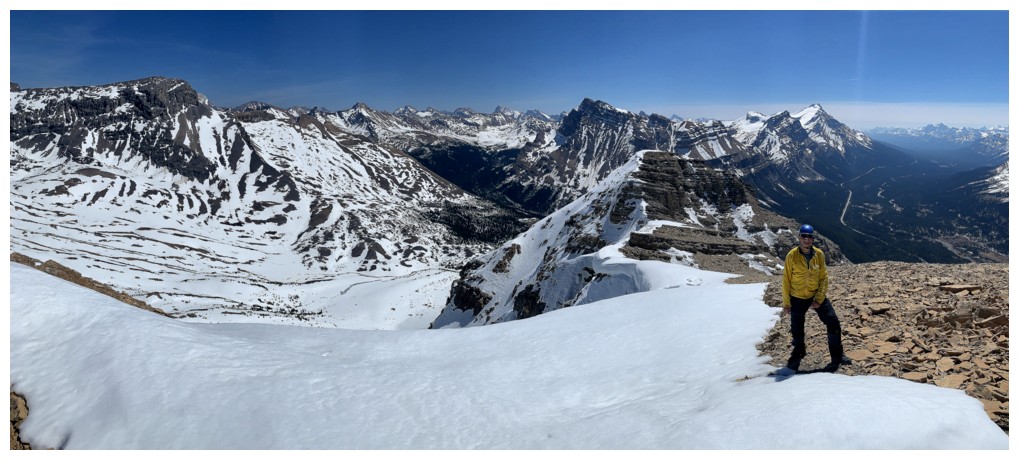
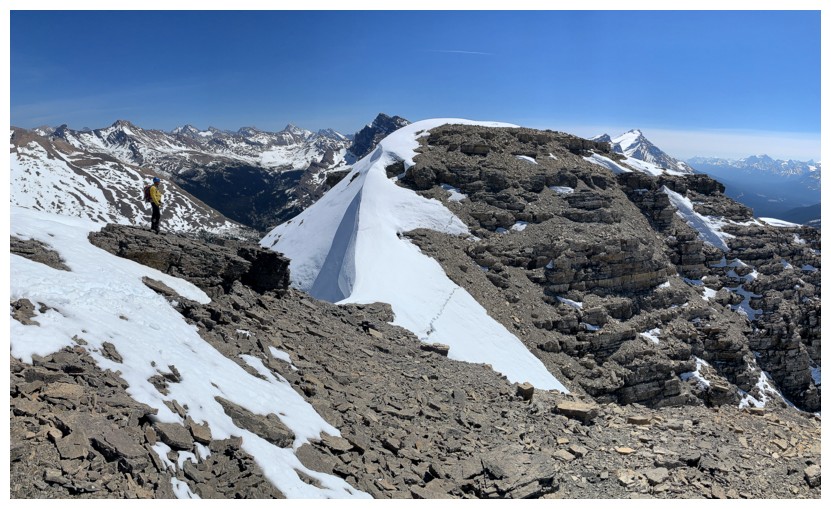
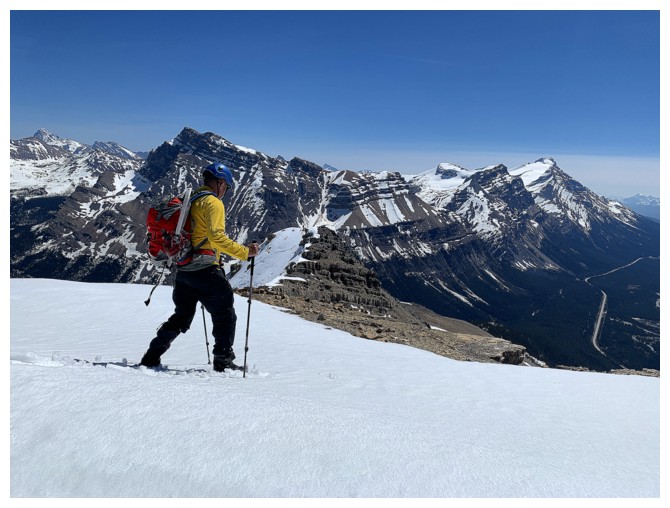
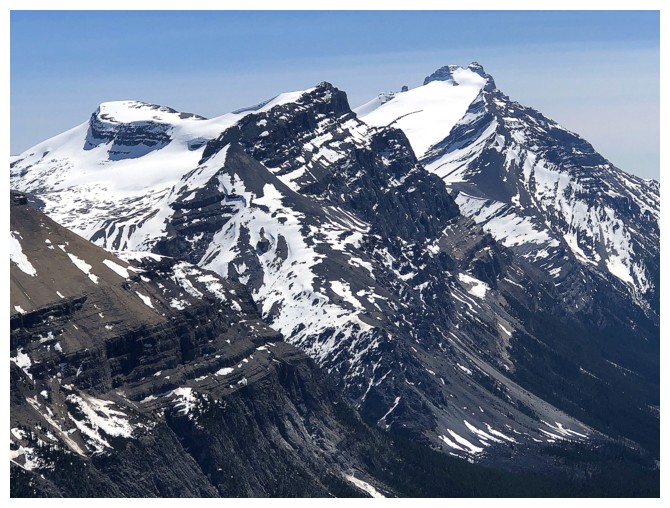
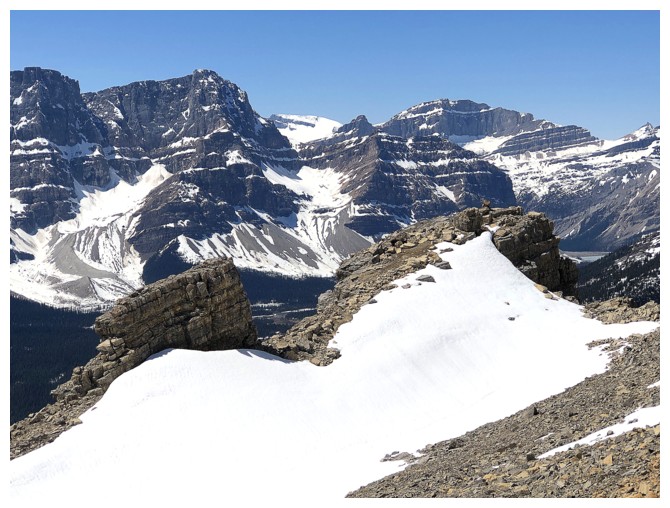
Mark reaches the ridge. Noseeum Peak dominates the background. Andromache, Little Hector, and Mount Hector to the right.
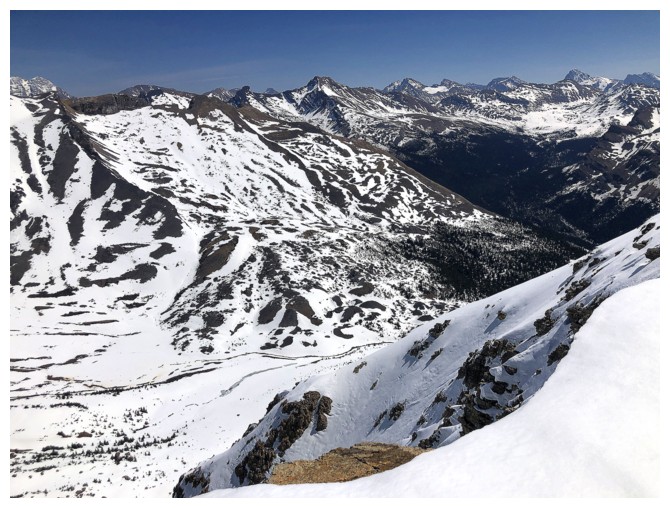
The wonderful view to the east features two trios of peaks: the OXO, OX, O trio and the Quartzite, Ramp, Mosquito trio
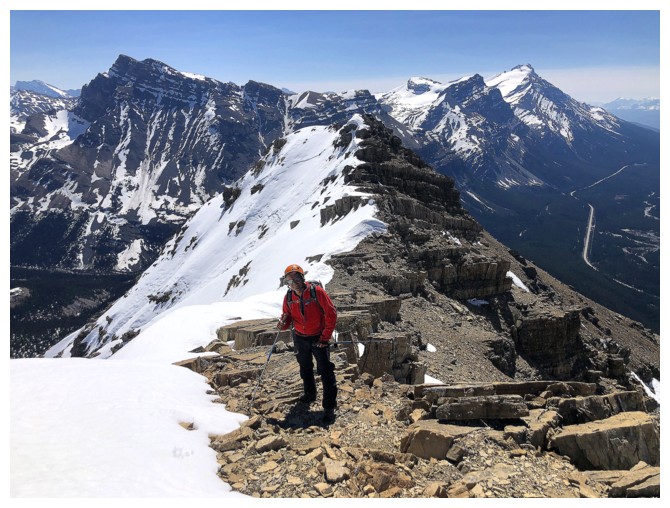
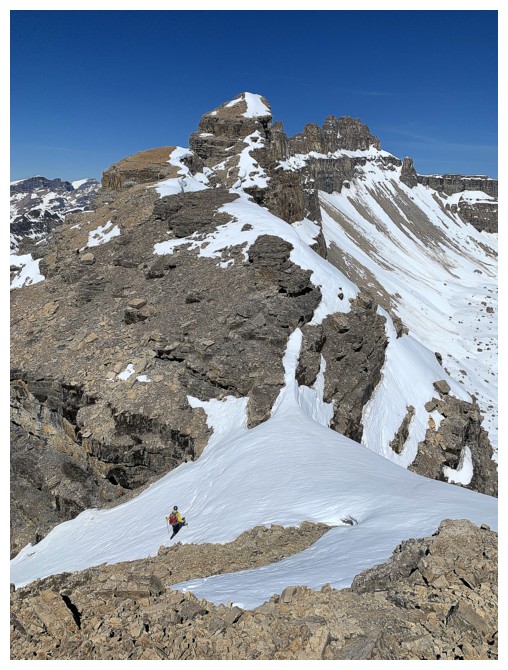
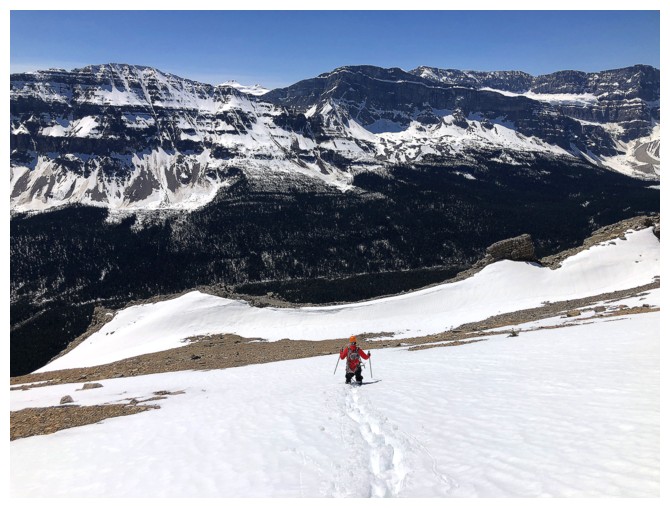
Trudging up the ridge
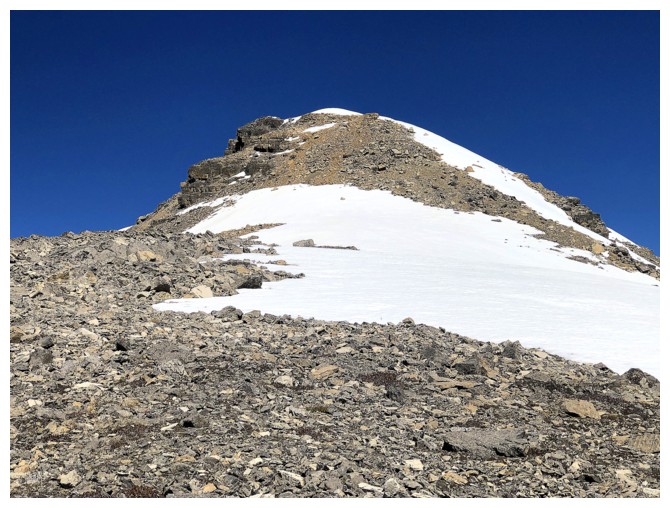
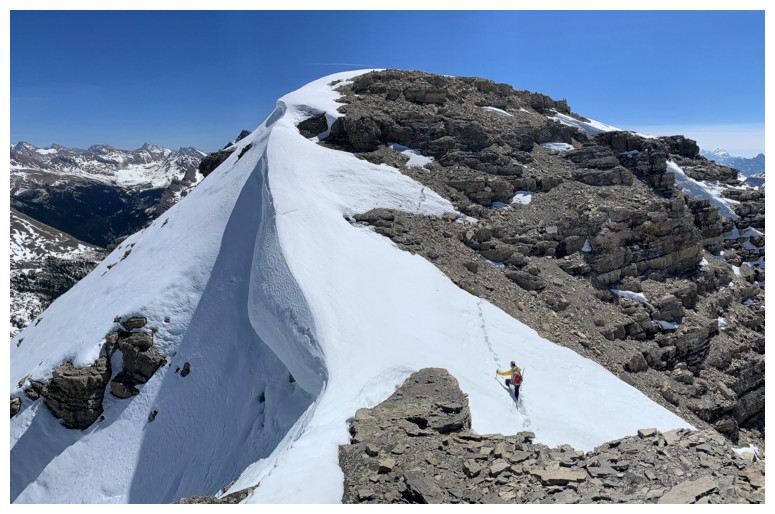
The false summit ahead. That's a ridiculous lack of snow for this elevation, in this location, at this time of the year.
I should be snowshoeing not scrambling!
Approaching the false summit
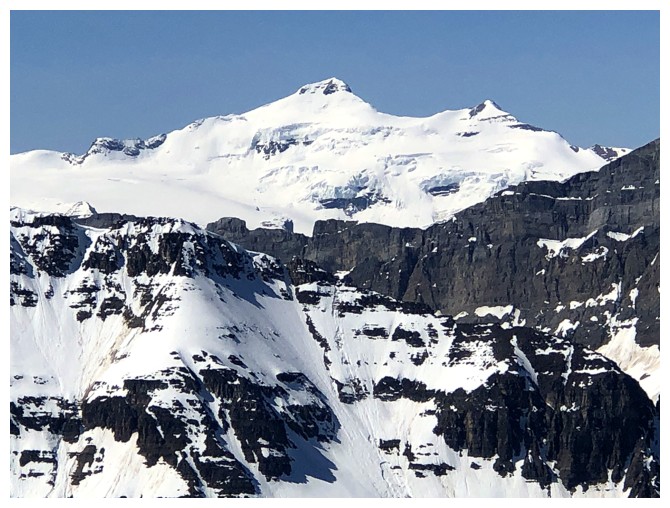
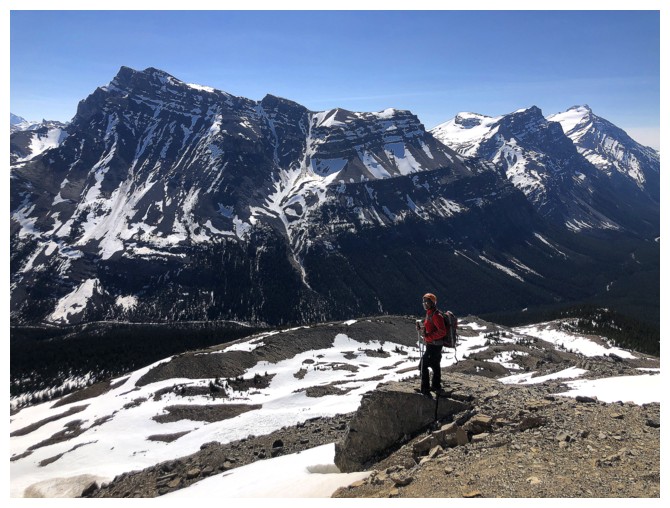
Mount Balfour
Four of the Lake Louise area giants: Deltaform, Lefroy, Hungabee, and Victoria
Hector, with Little Hector in front
15 months earlier this section took me 30 minutes to traverse - it took less than 2 without the huge cornices and deep snow
 \
\
But was still super scenic
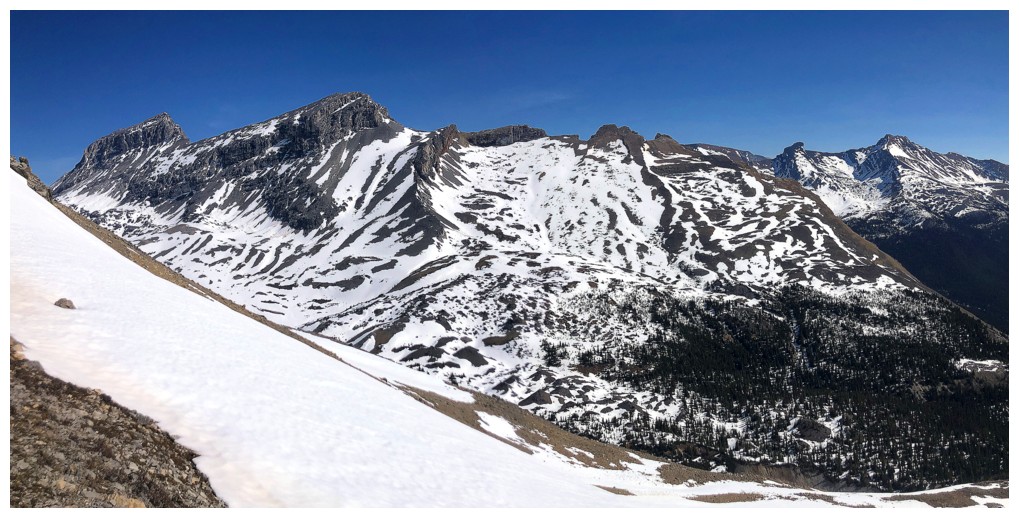
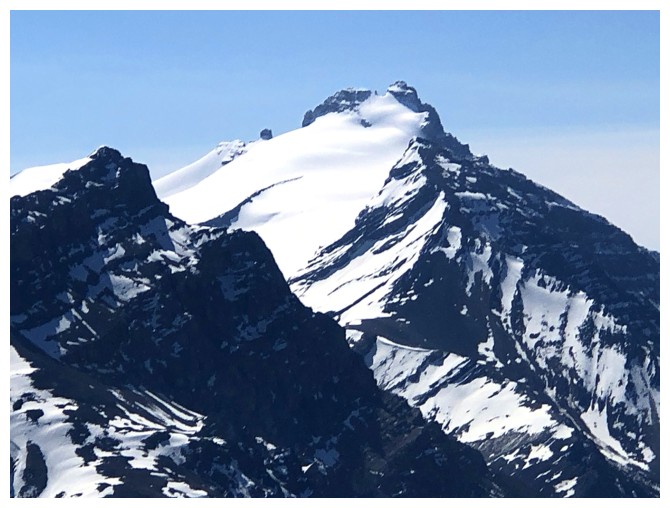
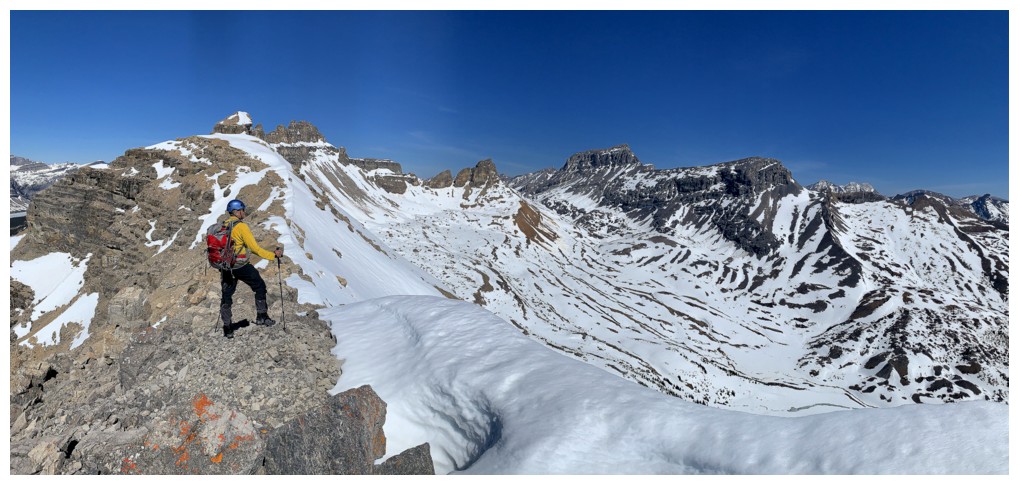
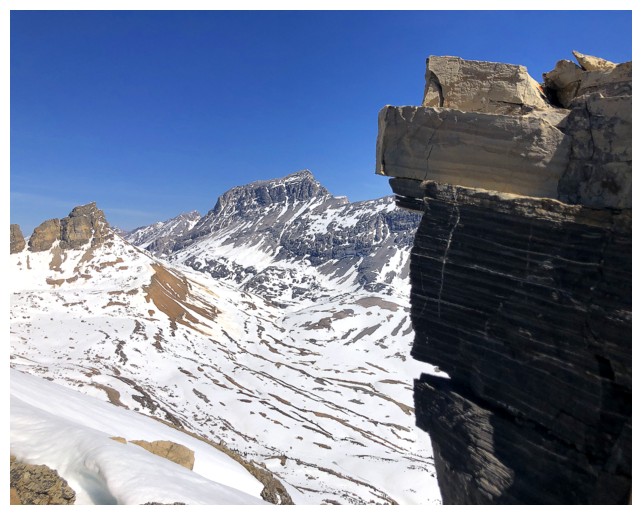
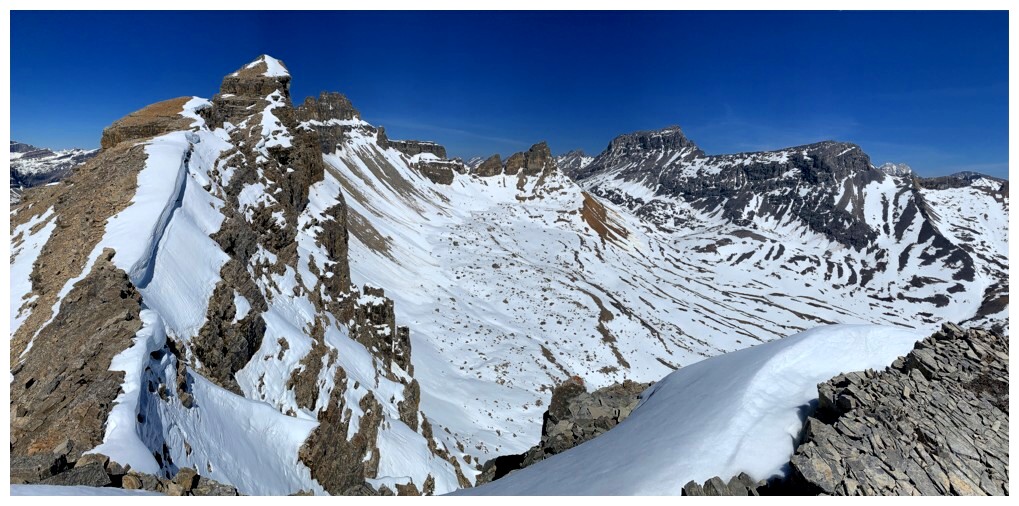
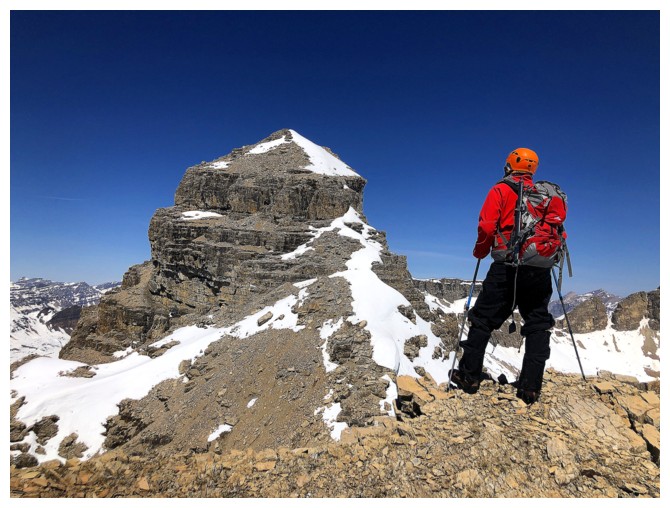
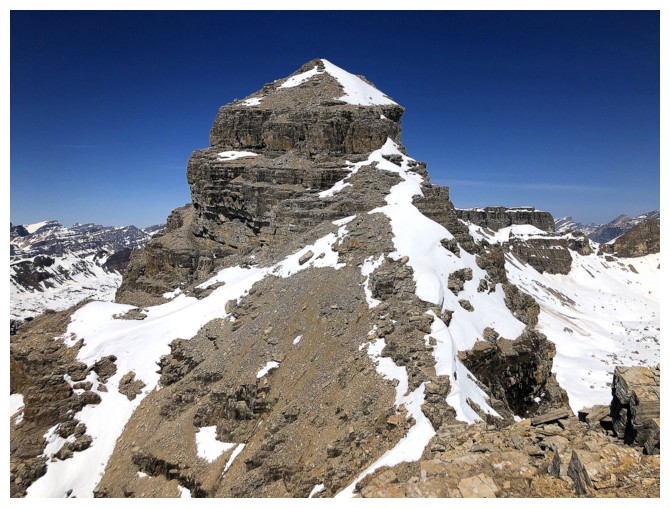
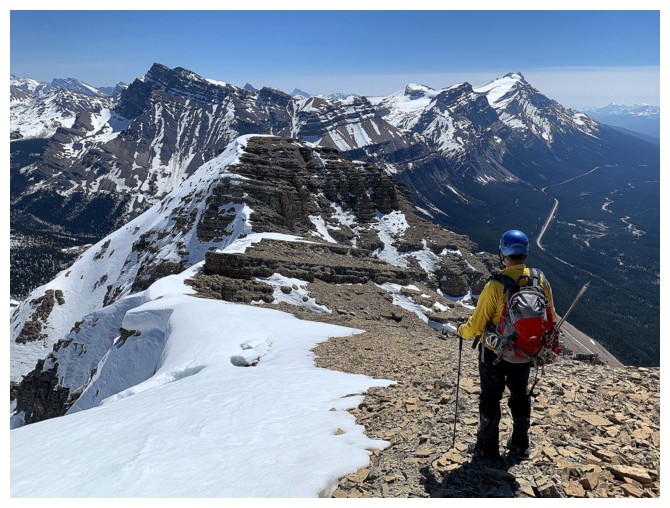
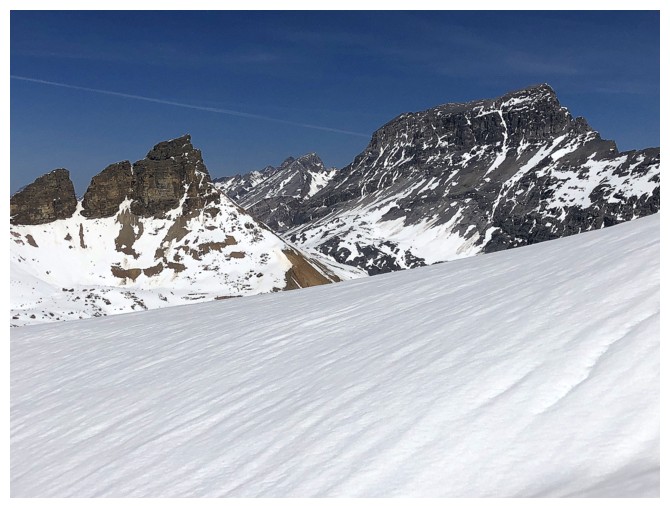
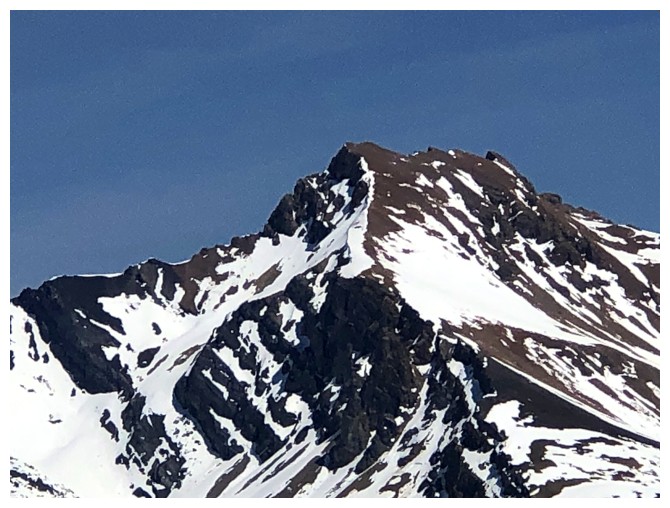
Dolomite Peak is a real looker from all angles
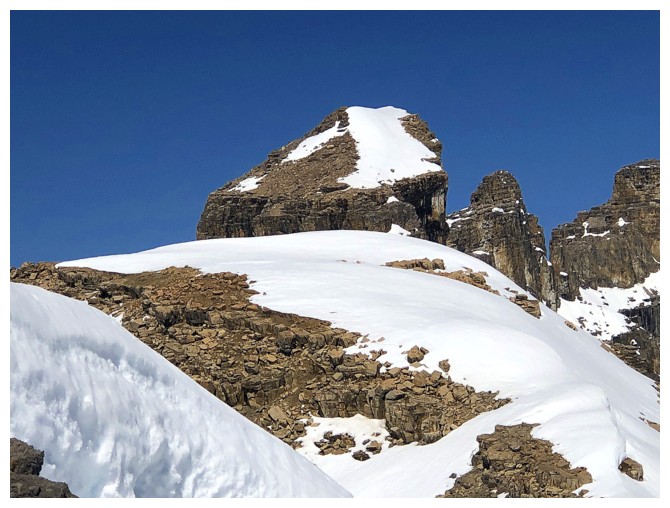
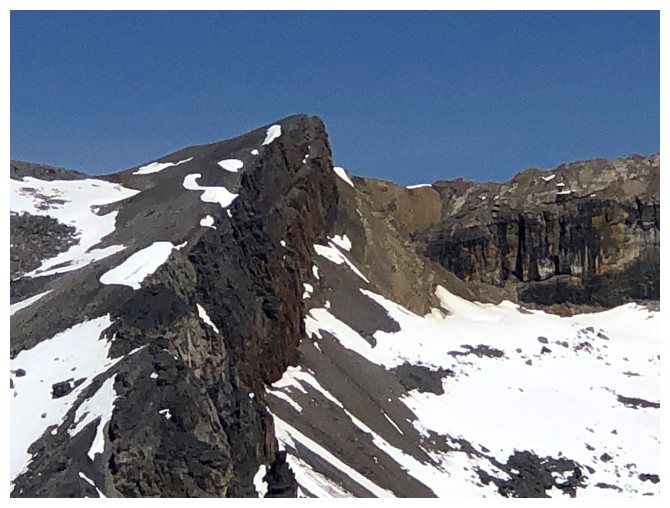
The southern-most tower of Dolomite
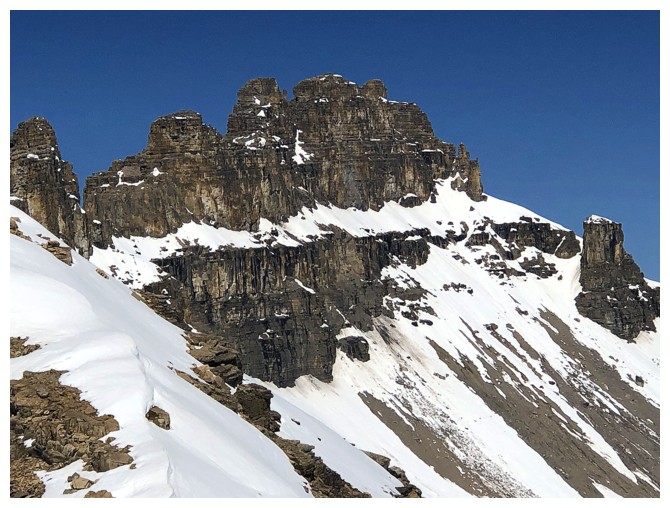
The other towers and highest point
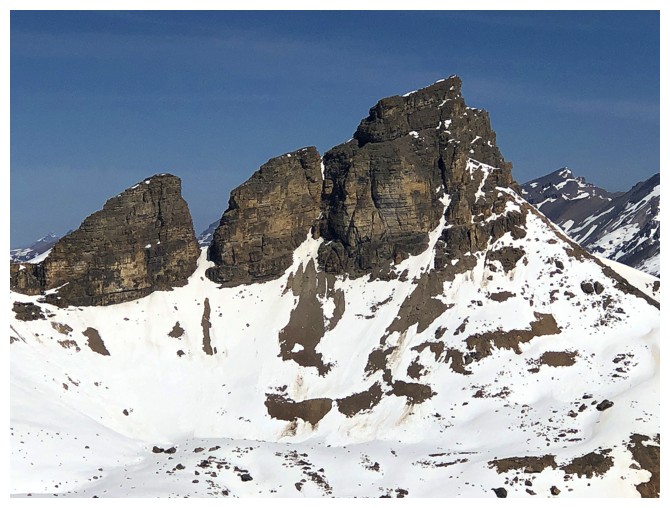
This impressive outlier of Dolomite to the northeast looks impenetrable from all directions

Checking out the vertiginous drop on the east side
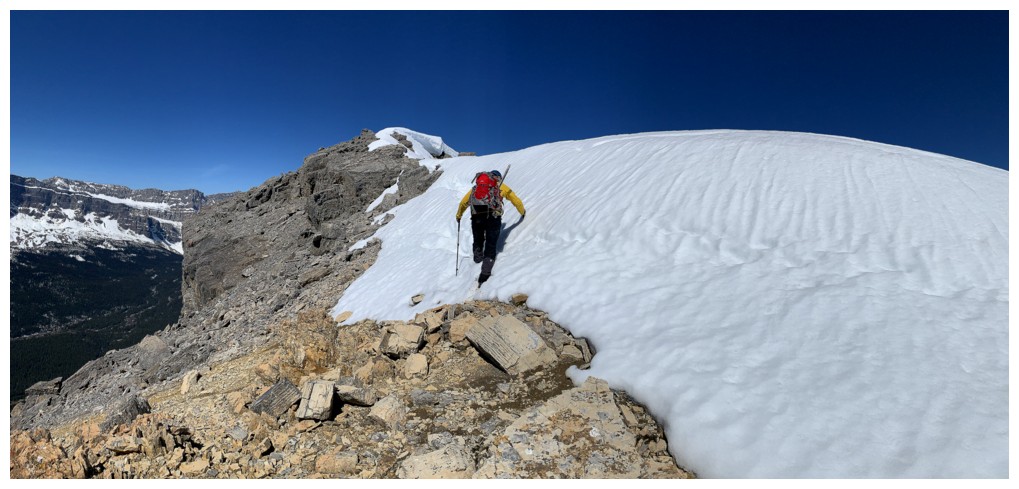
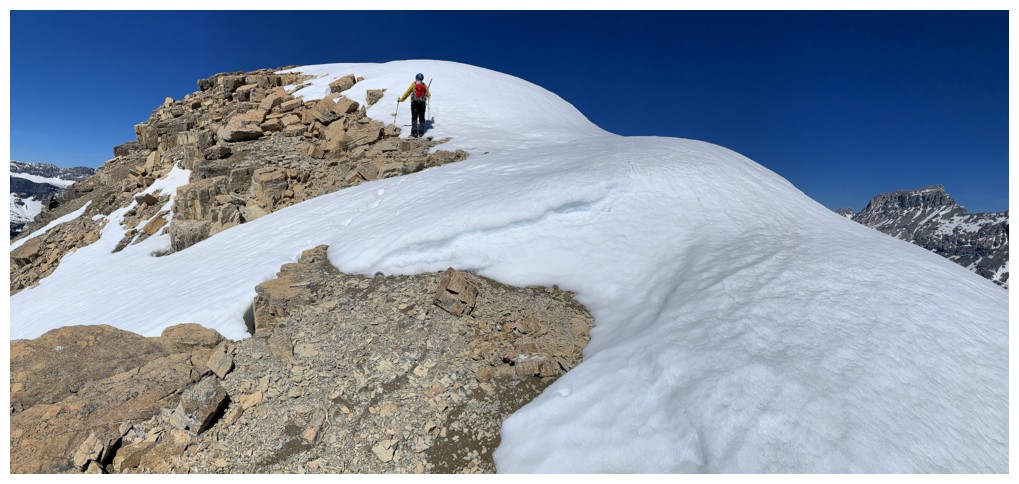
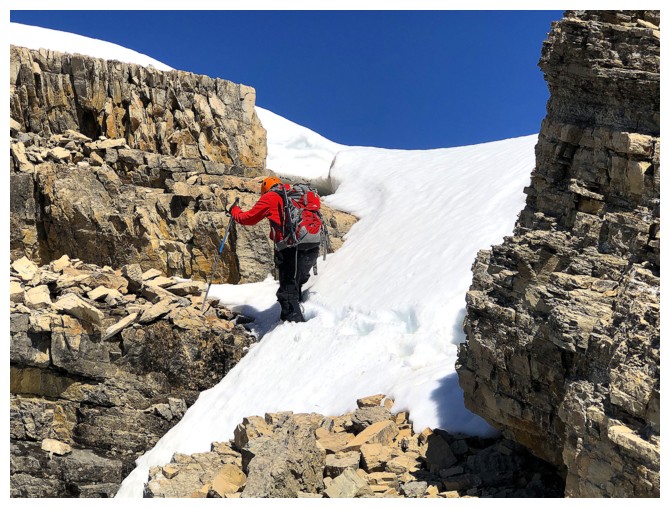
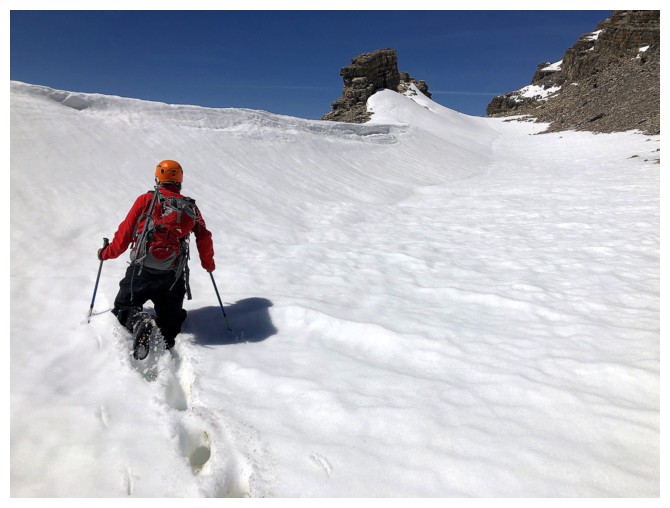
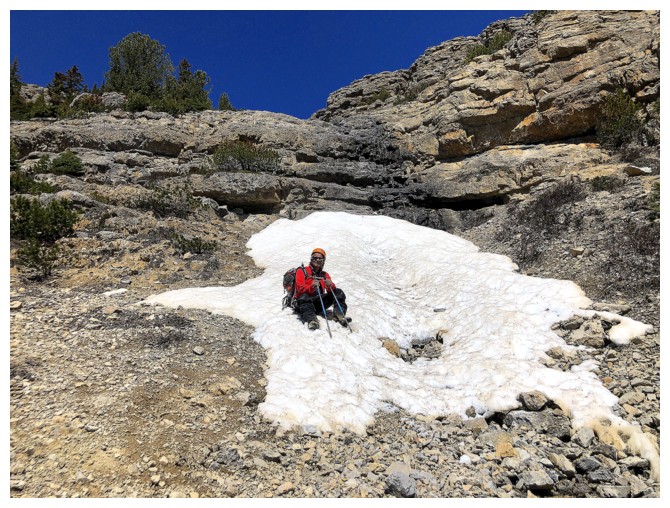
Mark traverses the short snow section
Sweet view!
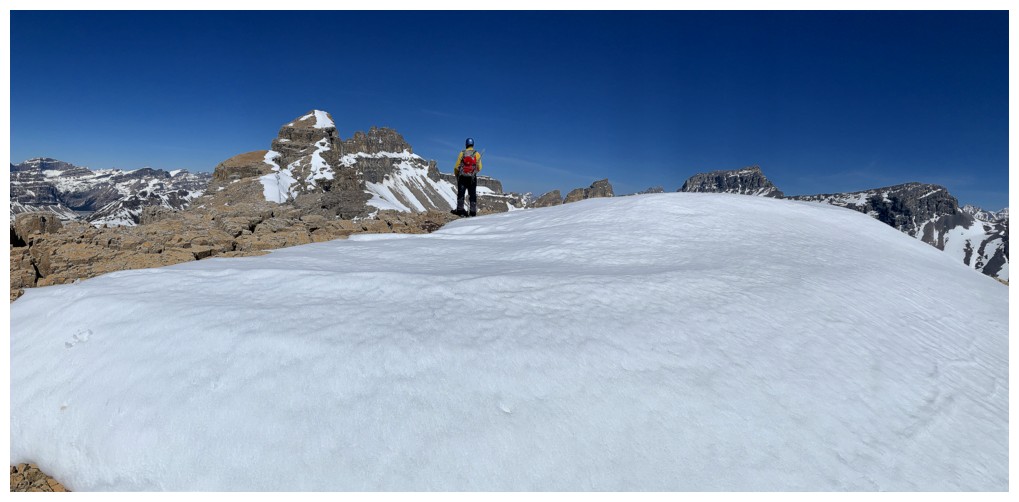
 \
\
Sweeter view!!
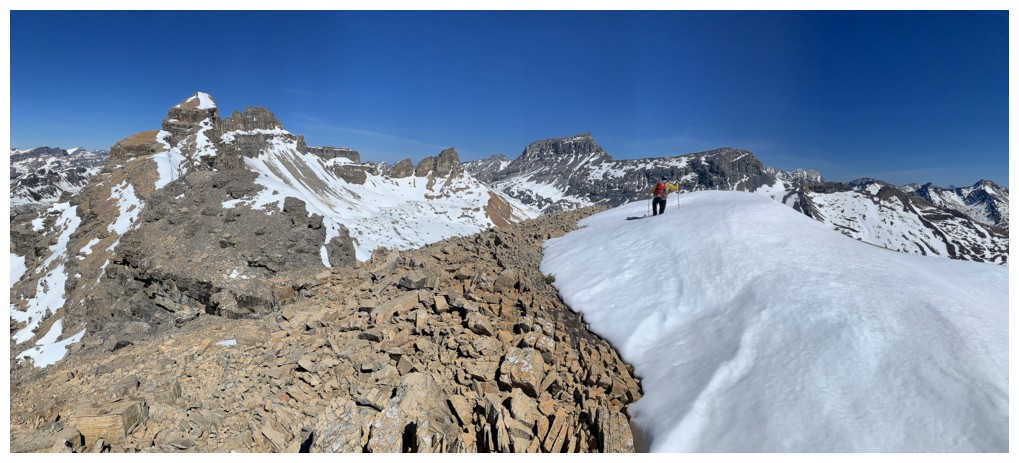
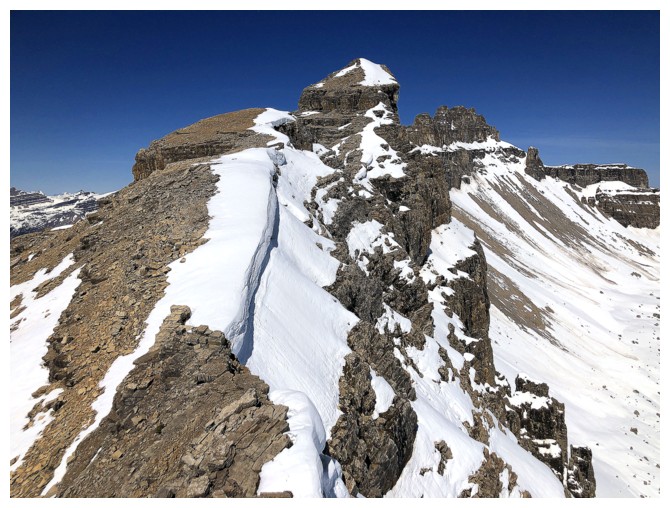
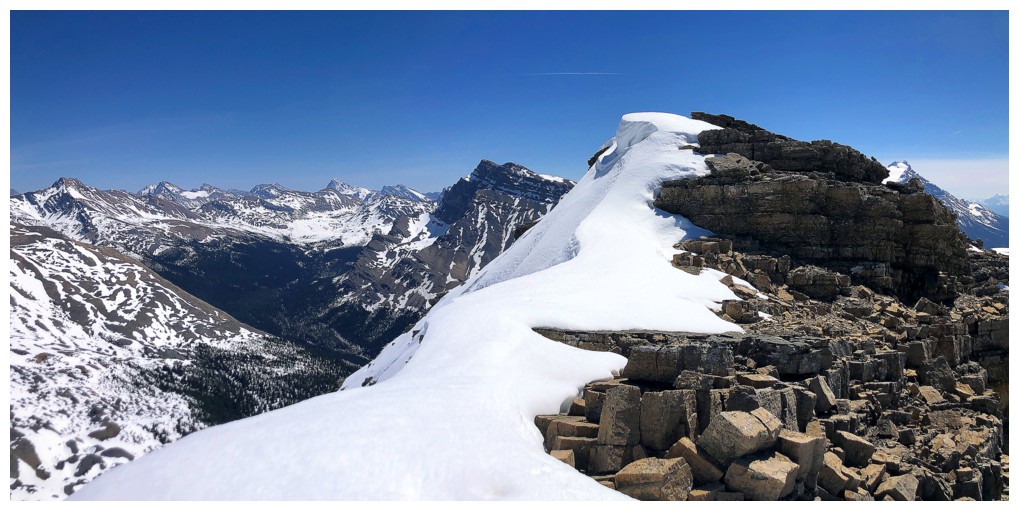
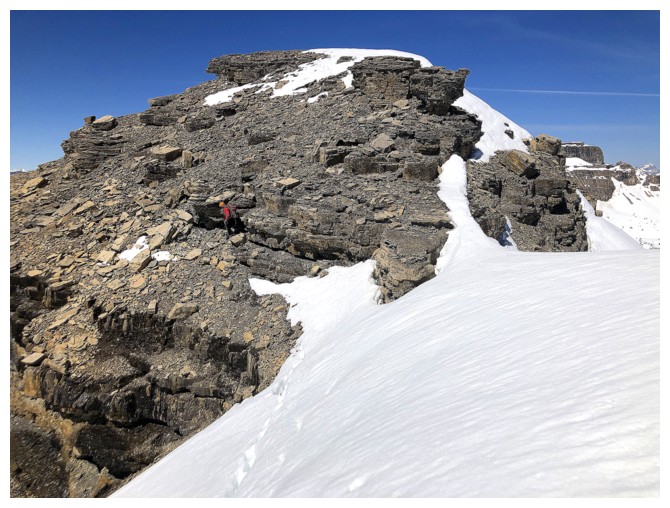
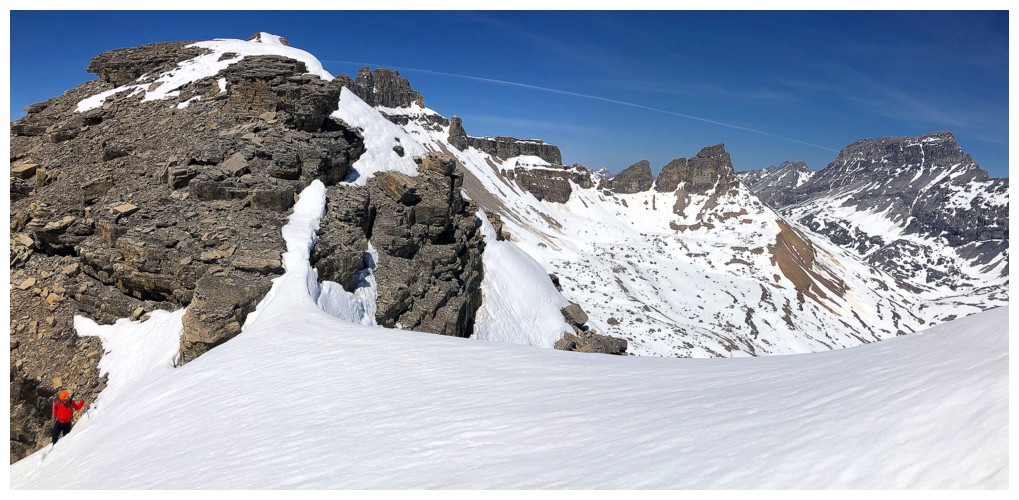
There are a few tricky sections to negotiate while traversing the ridge
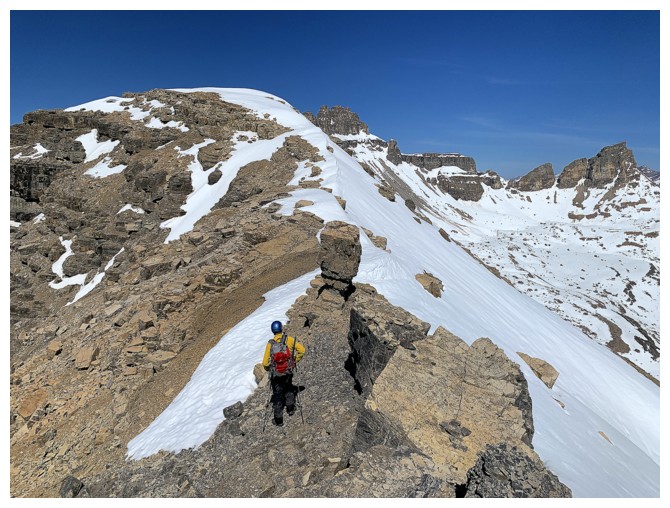
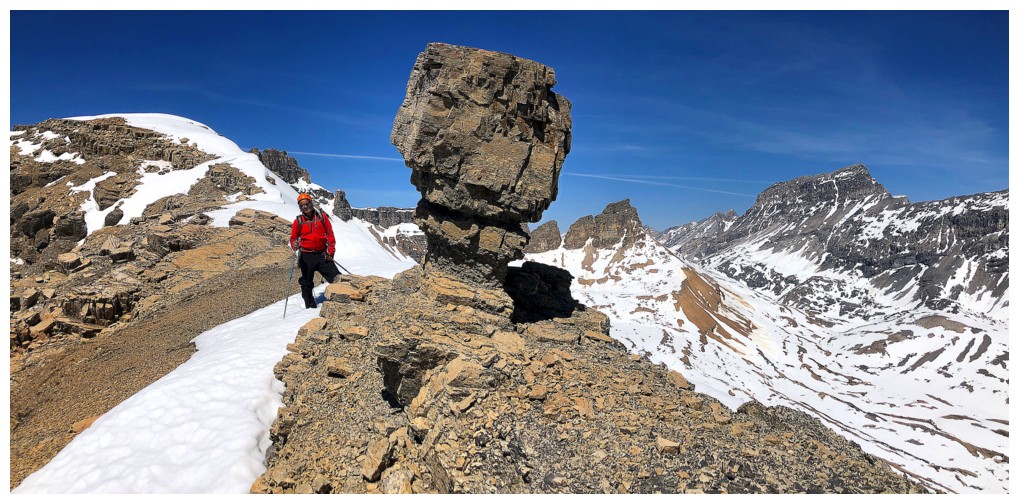
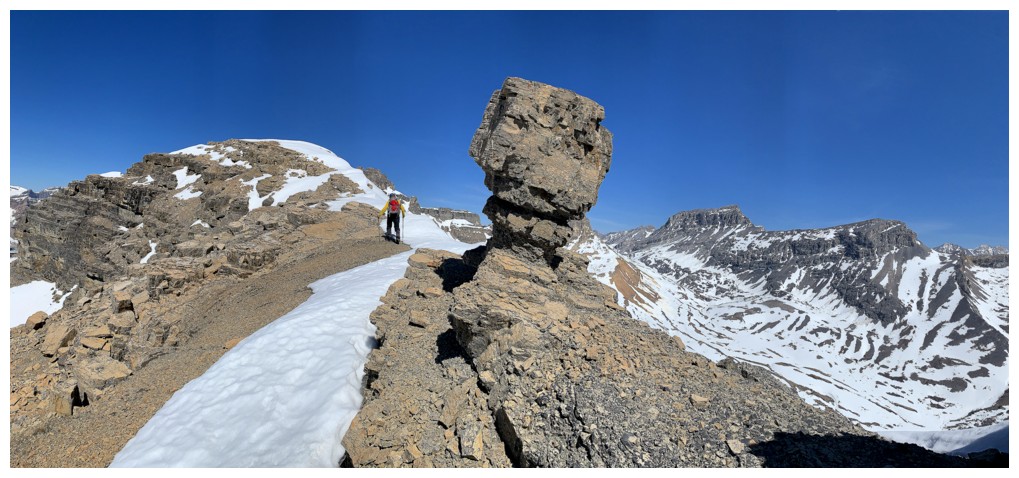
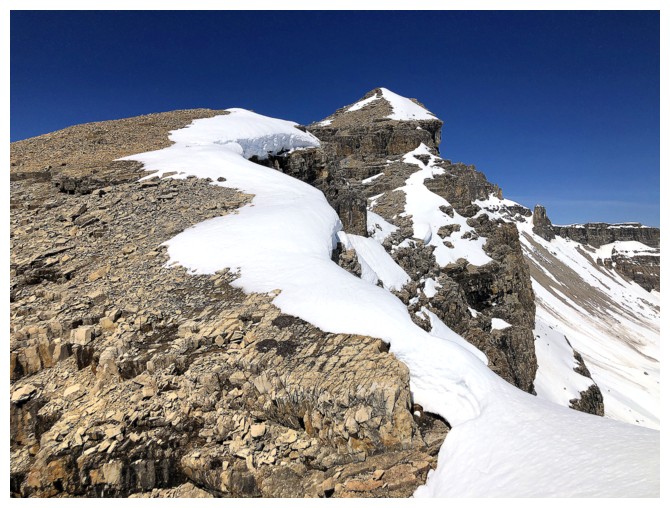
Approaching that very distinctive pinnacle
In many places the rock had fractured very cleanly
OXO and some cleanly fractured rock
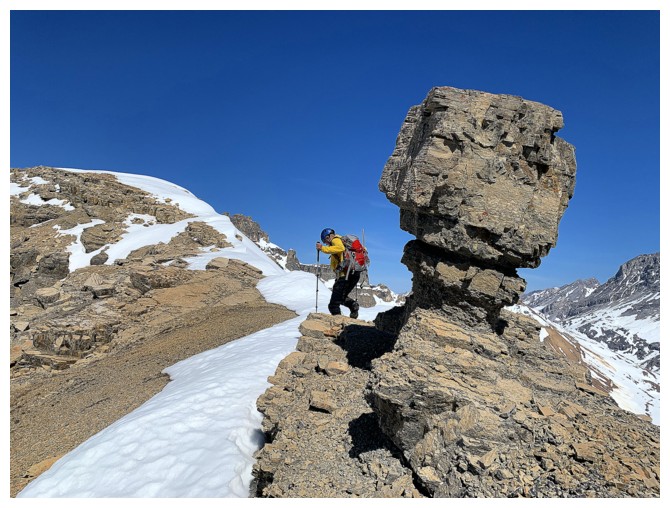
Passing the pinnacle
Same as above
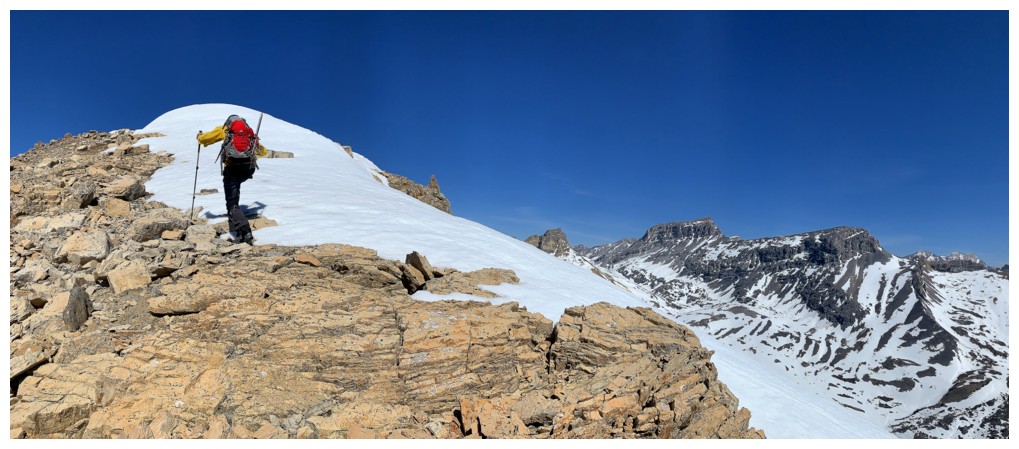
Continuing the enjoyable ridgewalk
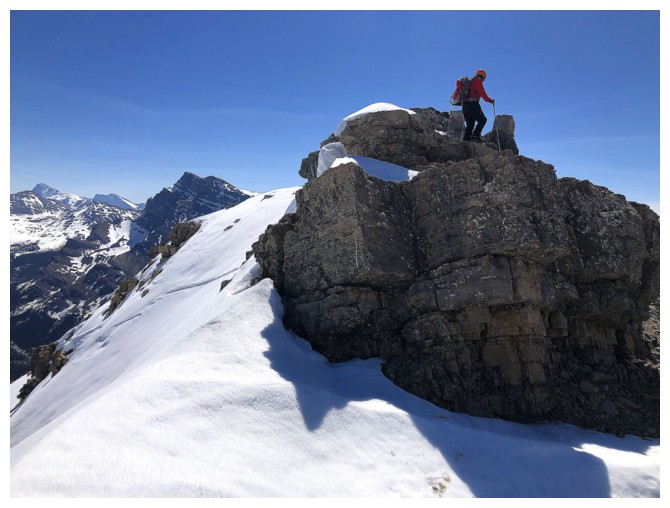
Approaching the highpoint I reached on my first trip
Arrived
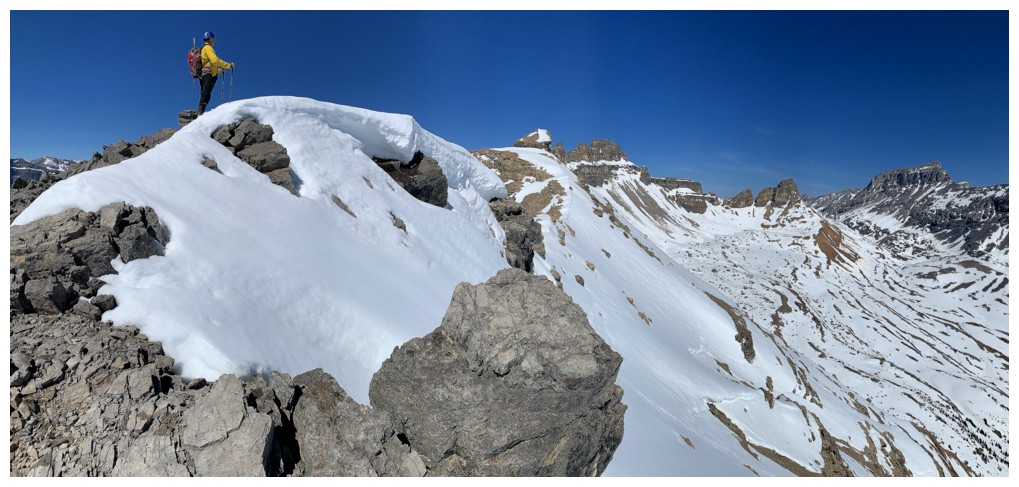
Deep snow at the top and clear cornice concerns
Didn't stay long at that summit
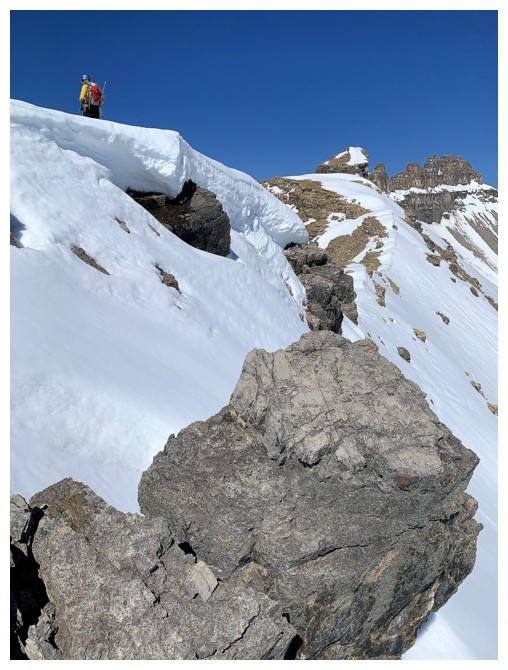
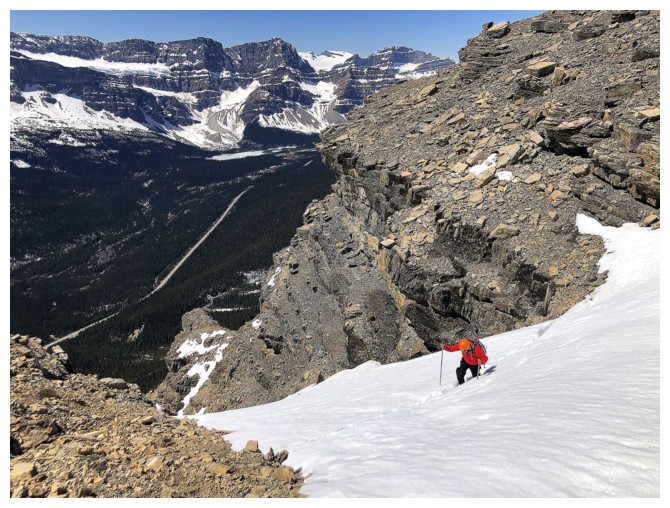
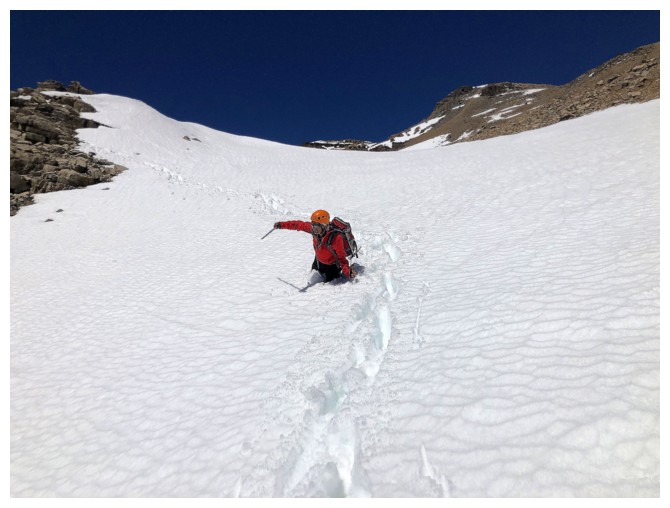
Probably the crux of the trip. Had to be sure there was solid ground under the snow
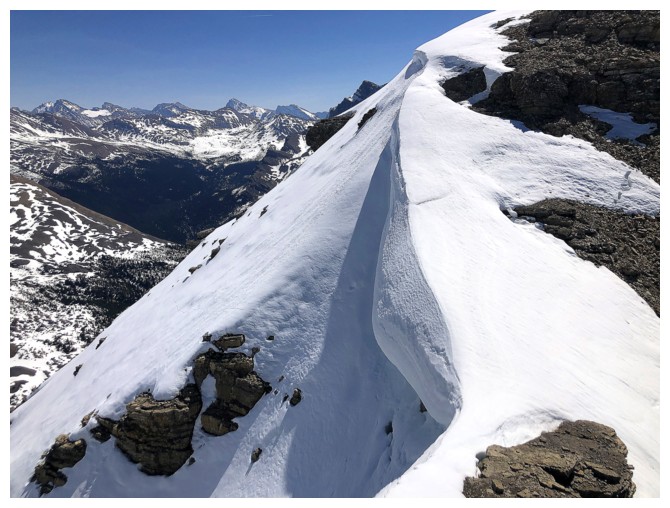
There was solid ground beneath the snow where we crossed, but the cornice was huge
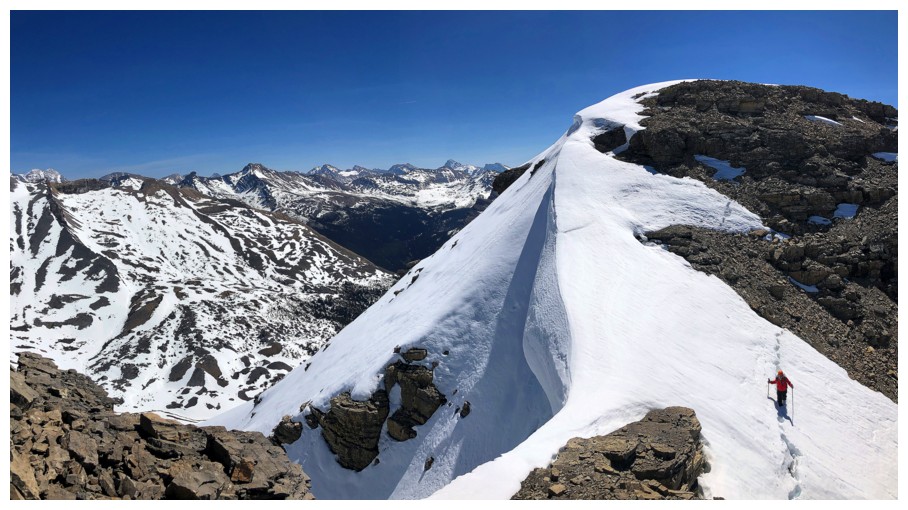
Mark makes the crossing
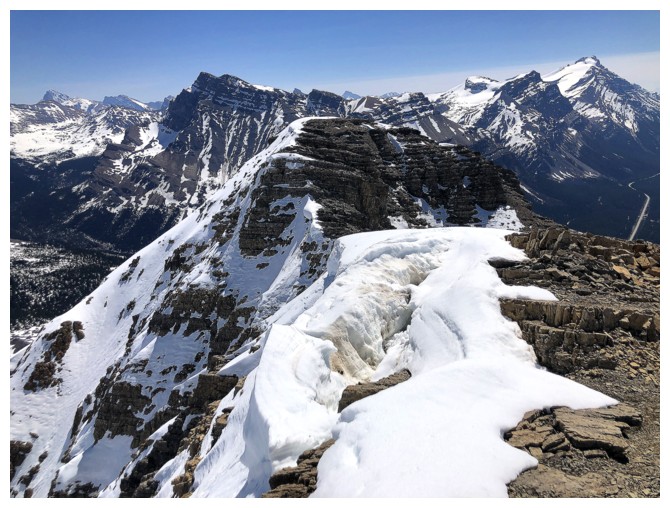
The view gets even better and continued travel up the ridge seems feasible for now
Looking over to a few of the peaks of the Wapta Icefield

Easy travel for a while
View to the southeast
Then travel becomes more challenging
Couldn't get enough of this view
Another notch to negotiate
Looking to the other side of the notch
Huge chunks of snow were separating from the main body
Thankfully there's a relatively easy route to get past the notch
However, you wouldn't want to slip down to the left - it was very steep
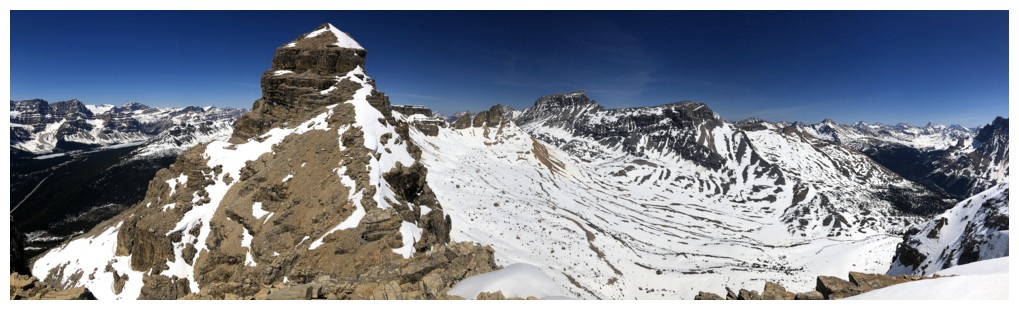
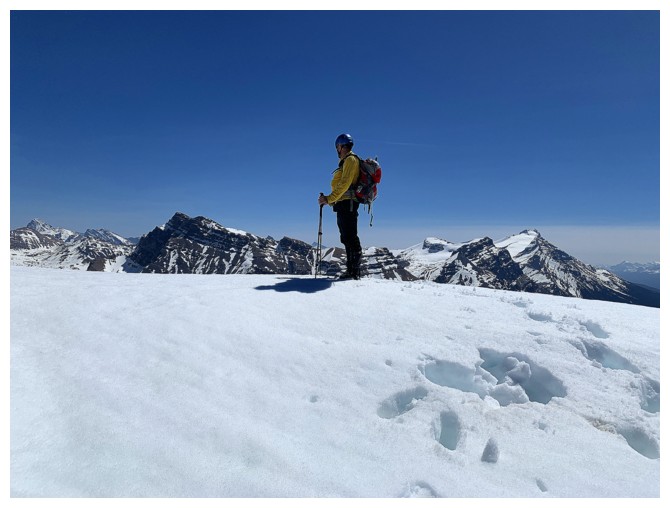
Mark reaches our highpoint of the day
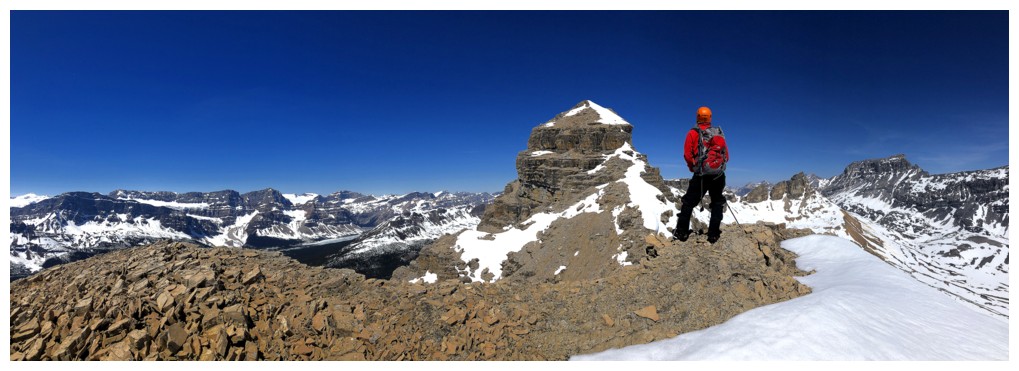
Same as above with more of the view
Just the south tower
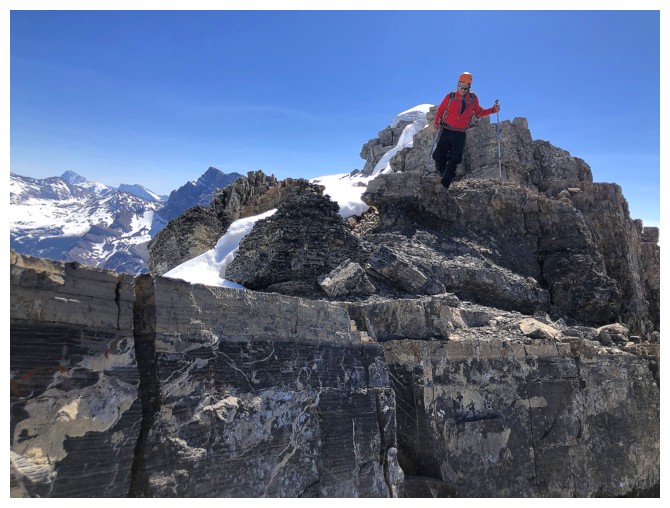
My turn for a summit photo
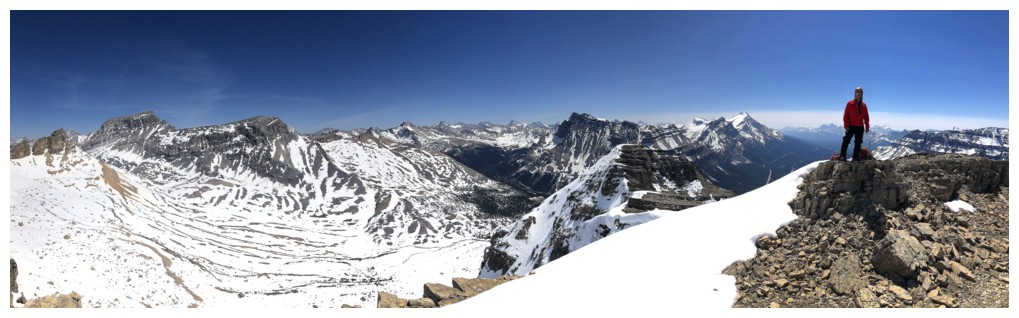
Southeast and south view
Back to the north
Again to the south
Heading back the way we came

Same as above
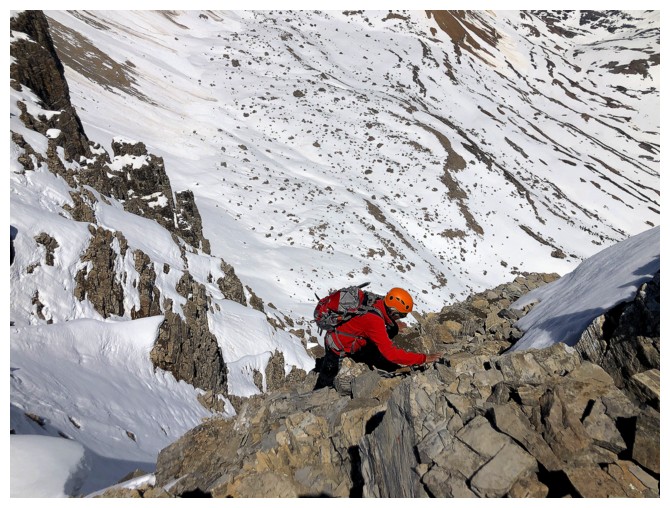
A few moves of exposed scrambling
Enjoying the same great snow and mountain scenery on return
Nearing the crux
Back over the snow
Getting onto the snow requires a few careful steps
The Dolomite outlier and OXO
Mark crosses the snow
Same as above
Back at the first highpoint
Resuming the descent
Andromache and the Hector's again
Mosquito Mountain
Part of the OX to O ridge. The highly oxidized red rock is a cool feature of the wall in the centre
Using the remaining snow to make fast work of an alternate descent route
Approaching some interesting terrain on the alternate descent route
Getting to it required some knee-deep snow wallowing
Followed by some waist-deep
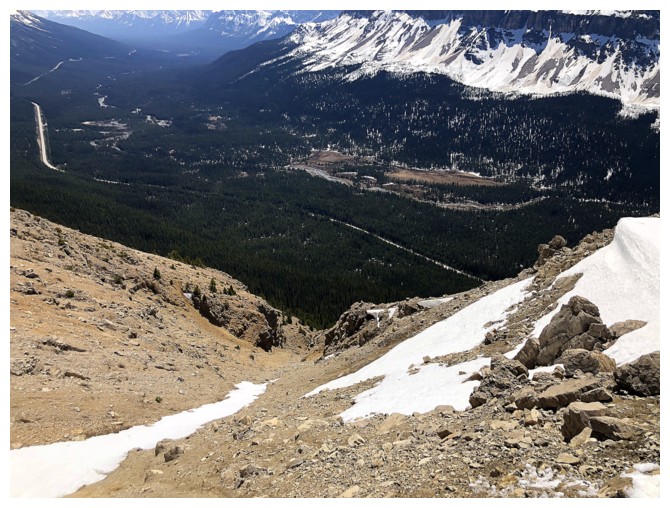
Off the snow and looking down what we thought was going to be a cakewalk back down to the road
This scree gully looked like it would go, uninterrupted, all the way down
Beautiful rock on both sides of the gully
Mark sits below one of two drop-offs we had to circumvent
The End
LOG